Before beginning this tutorial you will need to install and activate the free Jetpack plugin. Read this post for instructions on how to install Jetpack.
Promoting your blog and new posts when you publish them is a major part of the battle when it comes to building up a successful website. To help streamline the process, Jetpack includes an extremely useful feature called ‘Publicize’ which will automatically share new posts on specified social networks, such as Facebook and Twitter, whenever they are published. In this chapter, we’ll take a look at how to set up this invaluable feature to help spread the word about your new content.
Jetpack supports the following social networks for automated posting: Facebook, Twitter, Google+, LinkedIn, Reddit, Digg and StumbleUpon. You can also define your own additional custom services if you want to promote your posts on social networks which are otherwise unsupported.
Activating the Publicize Feature
If the Publicize feature is disabled, you will need to activate it before you can link your social media profiles in order to have Jetpack post and promote your blog posts on your behalf.
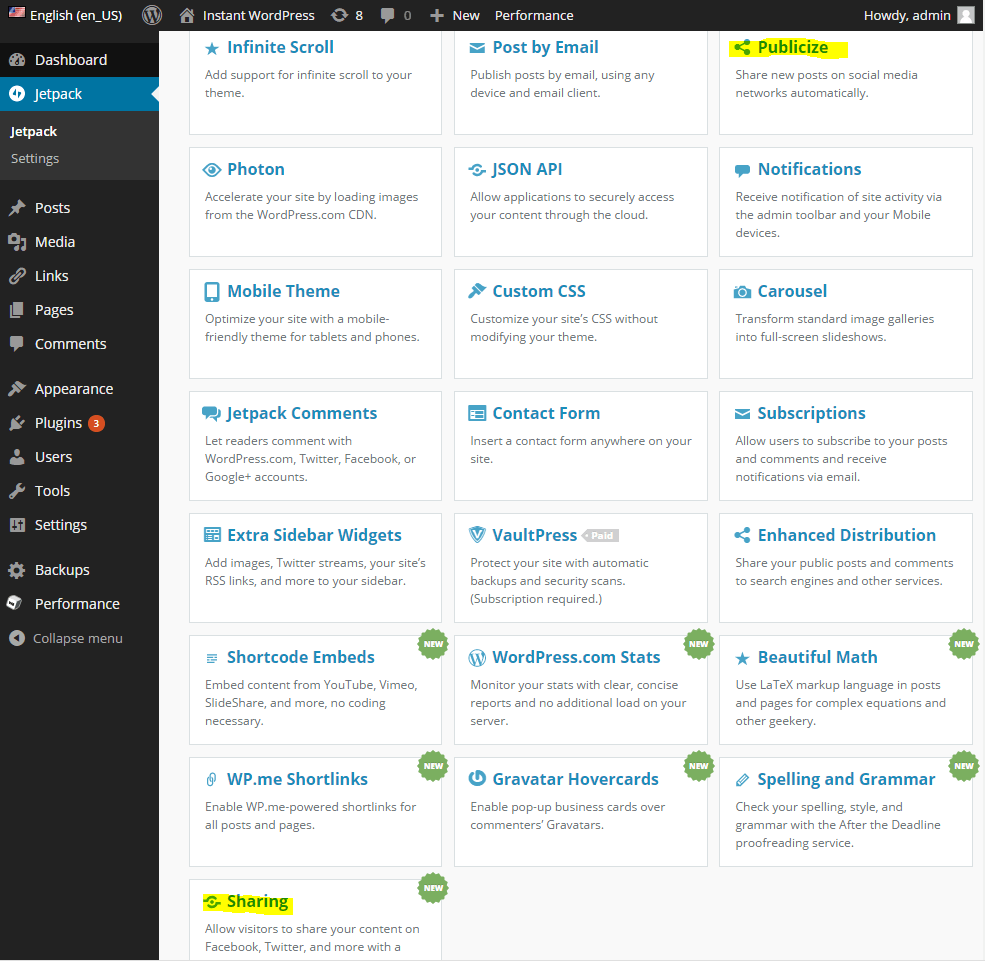
- In your administrator dashboard, click “Jetpack” in the top-left corner, scroll down the page and click “View all Jetpack Features”.
- Scroll down the list of features until you find “Publicize”. Click on the link and click “Activate” on the window which appears.
- In the same manner, also activate the “Sharing” feature, since it will allow you to add social media sharing buttons automatically to your posts.
Connecting to Your Social Networks
In order to have Jetpack publish posts on your social media profiles on your behalf, you will need to give the plugin your permission to access them:
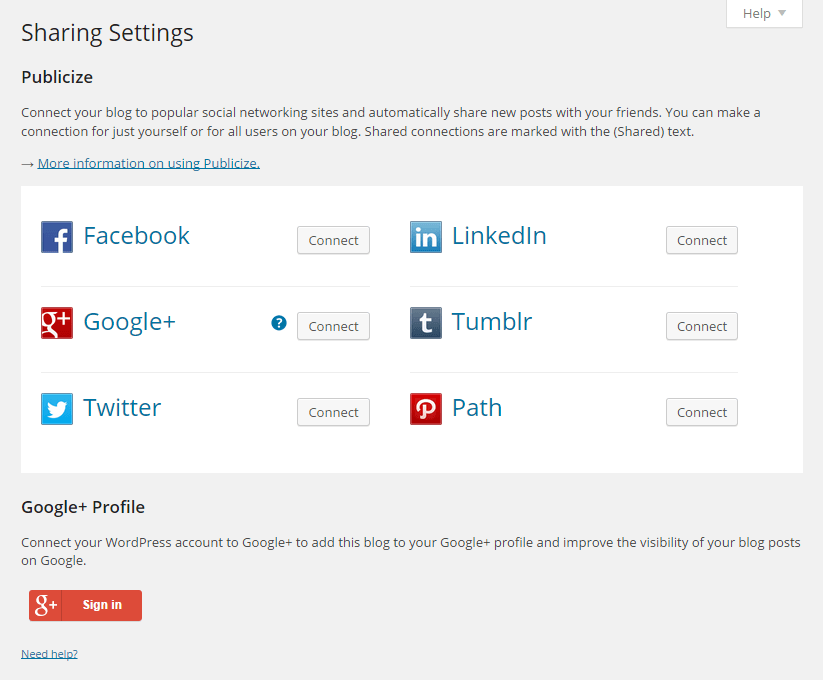
- Navigate to Settings > Sharing in your administrator dashboard to connect the social media accounts you use with Jetpack.
- Click on “Connect” beside the name of the social network you want to add, and enter your username and password.
- Once your connections to the services you wish to use have been approved, a list of them will appear in the “Publish” box whenever you write a new post.
Whenever you publish a new post, it will automatically be shared on your connected social media accounts, including an image such as a featured image, an image attached to the post or any other image that Jetpack can find in your post (in this order of priority). Note that only posts will be publicized; static pages, draft posts and duplicate posts will not be publicized.
Adding Sharing Buttons
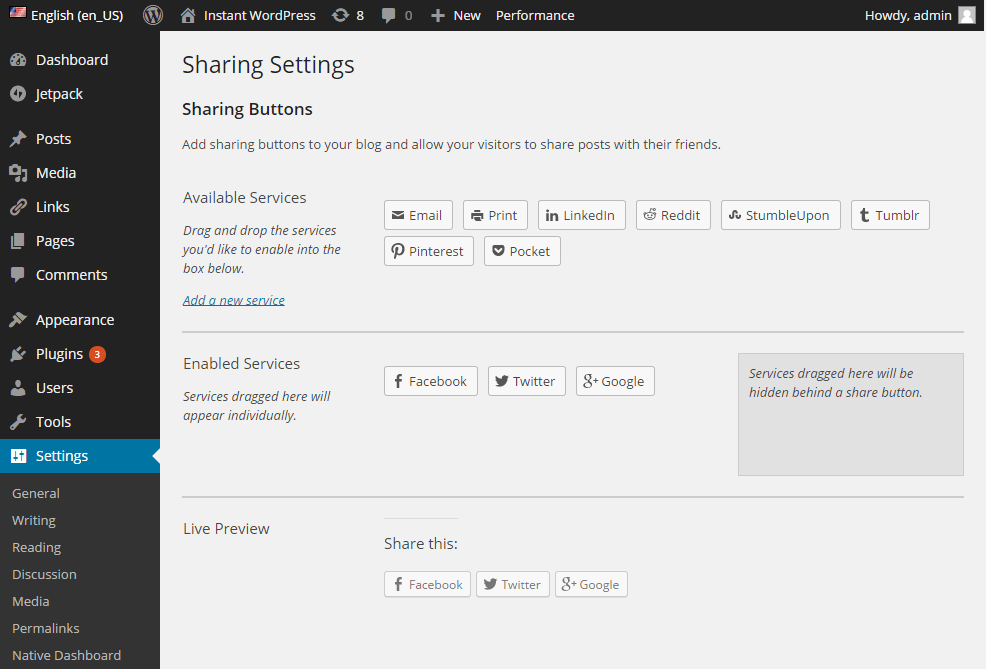
In the Sharing page in your administrator dashboard, you’ll also be able to add sharing buttons automatically to every post that you publish, allowing your readers to quickly and easily share your posts on their own social media profiles.
- Drag the buttons you want to add to your posts from the “Available Services” section to the “Enabled Services” section beneath it.
- Modify any additional options, such as “Sharing label” and “Button style” as required. Any changes will be displayed in the “Live Preview” window above.
- Click on “Save Changes” at the bottom of the page, and the sharing buttons will go live on every post on your blog.
With sharing and post publication set up, a great deal of your social media promotion will already be taken care of, and Jetpack and your readers will be able to start spreading the word about your hard work!
thanks alot, for me setting up a blog has been a big challenge, but i’ve done it!
Any idea how to link to a facebook page and twitter account that are not the main page on your fb / twitter account. i.e. when I try to link to fb and twitter via jetpack, it tries to link to my personal accounts, not the additional accounts I have set up for my blog… Thanks so much.
I would recommend copying the link to the page you want to link to, and then pasting it in a text widget. Just go to “Appearance” -> “Widgets” and add a text widget there, and then you can copy/paste the link.
A great help Scott. Thank you so much. Setting up my blog was a big challenge but I managed it with your help.
This worked for me. The steps are so easy to follow. Thanks so much. First time blogger!
Thank you!! So much! I have been struggling with this for some time. It worked like a champ!