If you haven’t installed WordPress yet, go to Step 2 to use my easy WordPress install guide.
Now that you know the basics of your blog, we can get into some more of the details. WordPress is an amazingly powerful tool that allows you to build your blog in just about any way you can imagine.
You’re probably thinking that your blog design looks pretty boring now, right? Not to worry, I will show you how to change your design and layout in this step, along with a bunch of other cool tips and tricks for personalizing your blog.
Click on the arrows below to see the guide for each topic:
Basic Blog Design
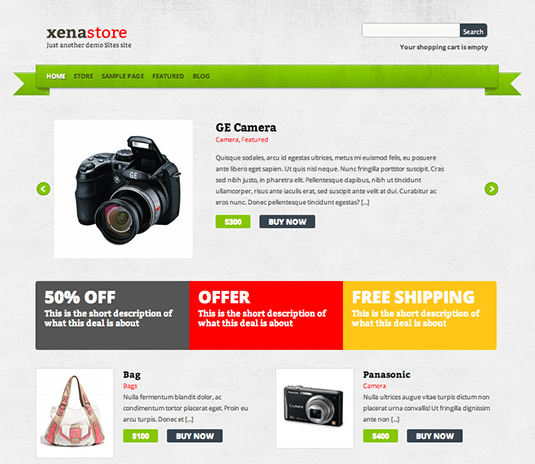
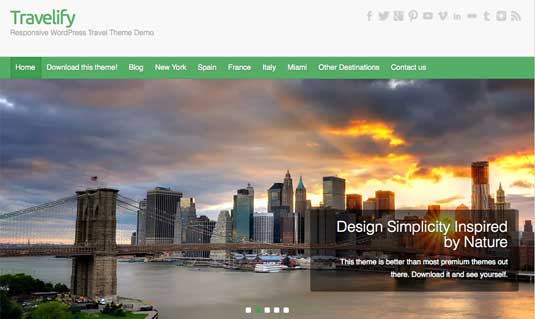
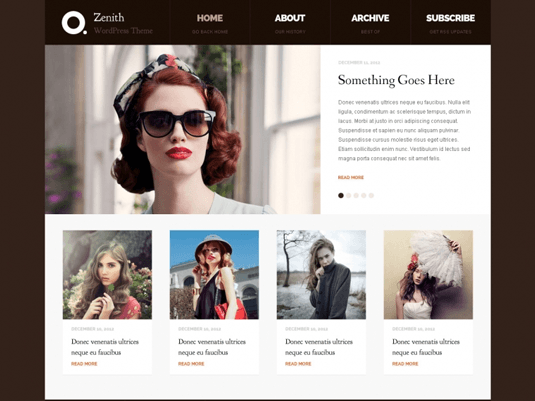
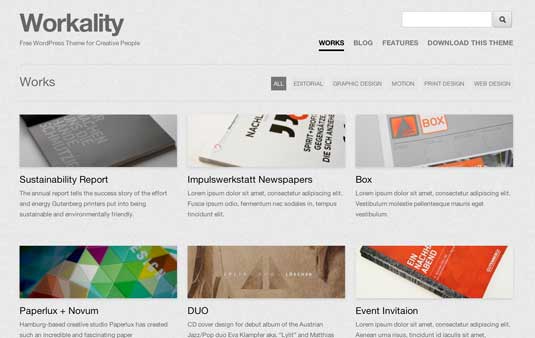
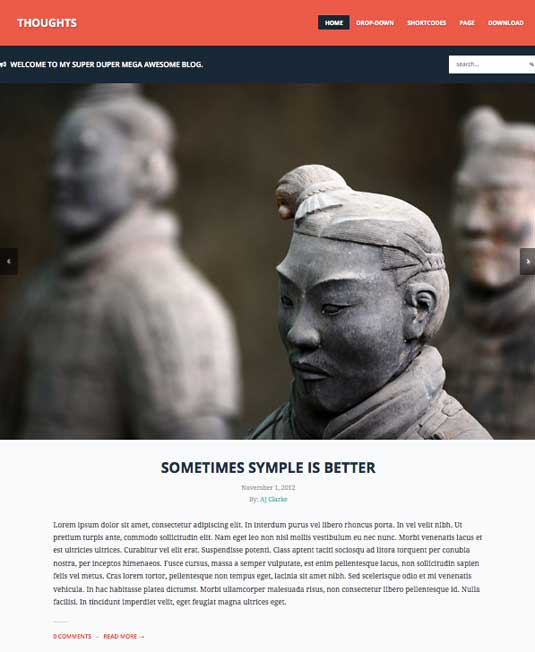
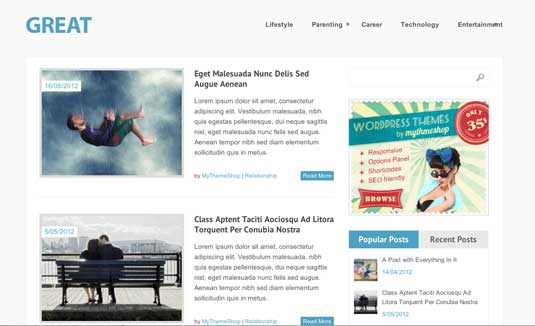
Everyone has a different idea of how they want their blog to look. One of the great things about WordPress is that you can change the entire layout and design of your site with just a few clicks. Here are just a few examples of WordPress designs that are completely free (click an image to see it bigger):

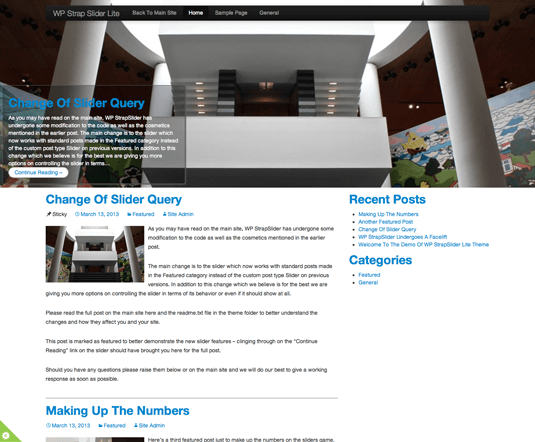
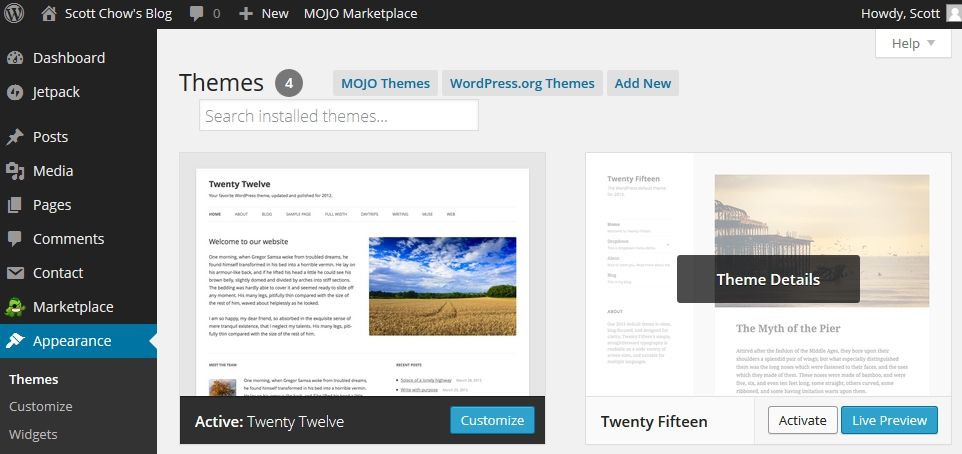
In WordPress, site layouts are known as “Themes”. Themes control the entire design of your blog. To change your theme you are going to click on the “Appearance” tab on the left menu.
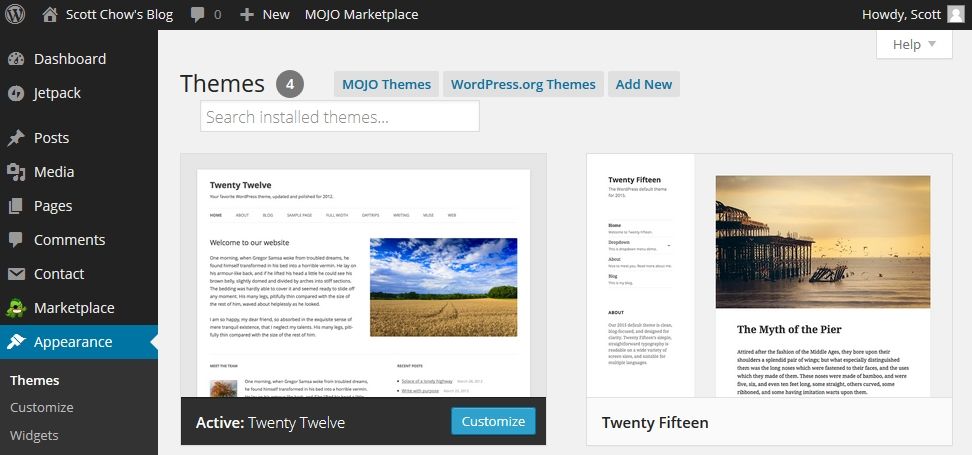
You will see several themes are already installed on your blog: Twenty Fifteen, Twenty Fourteen, etc. These are simple, clean-looking themes that can work for just about any type of blog. In fact, many of the world’s top bloggers use one of these themes.
Unless you have a very specific design in mind for your blog, I suggest you use one of these pre-installed themes to start with. For our example, let’s use the “Twenty Twelve” theme. In order to activate the theme on your blog, hover over the theme and click the “Activate” button. That’s it! You have just changed the entire design of your blog with just one click!
If you are not a fan of the themes that come pre-installed with your blog, don’t worry. There are thousands of other free themes that you can easily install.
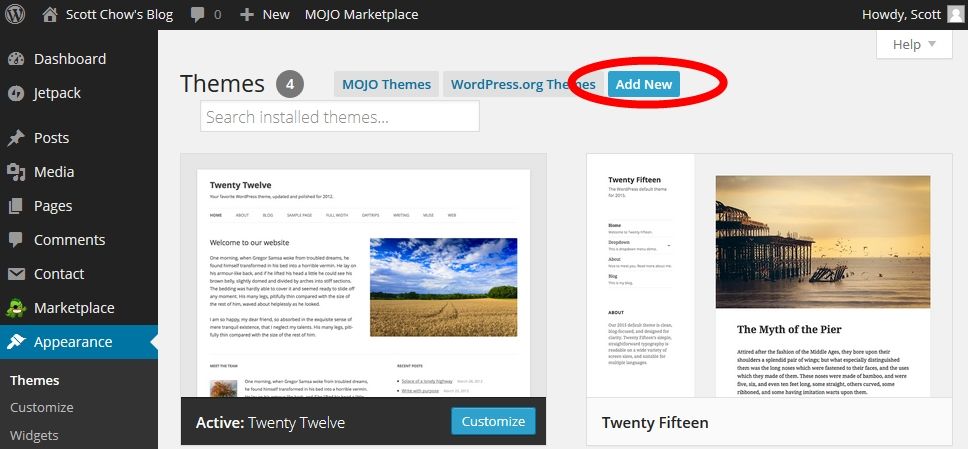
To install a new theme, click on the “Appearance” tab on the left menu. On the screen that comes up you are going to click on the button at the top that says “Add New”.
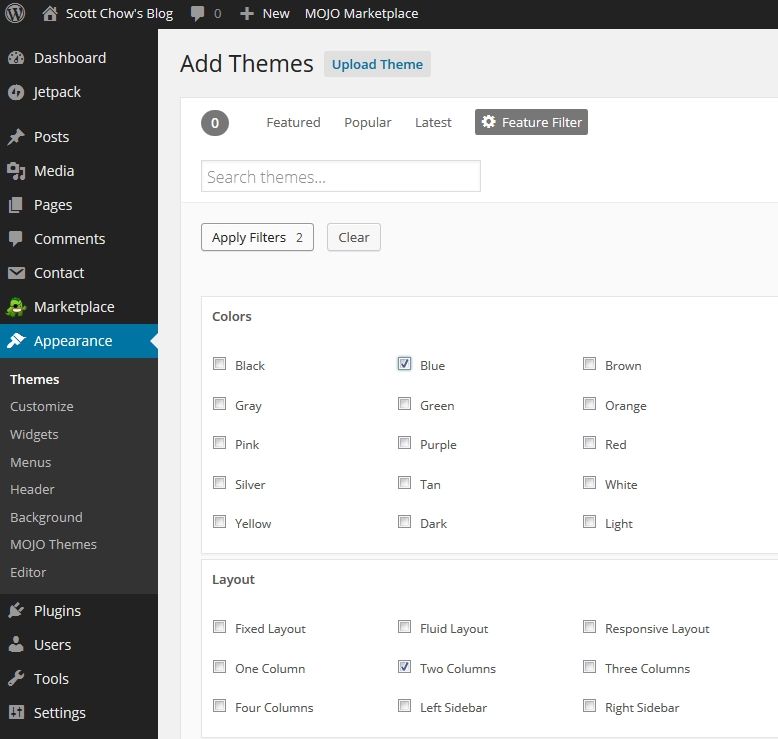
You will then be taken to the theme search screen. There are lots of different ways to find a theme you like. You can search by color, layout, and more by clicking “Feature Filter”. In the Feature Filter, check the boxes that you want and then click “Apply Filters”.
Now you can browse the themes that have the characteristics that you want. When you find one that you like, hover over it with your mouse and click the blue “Install” button.
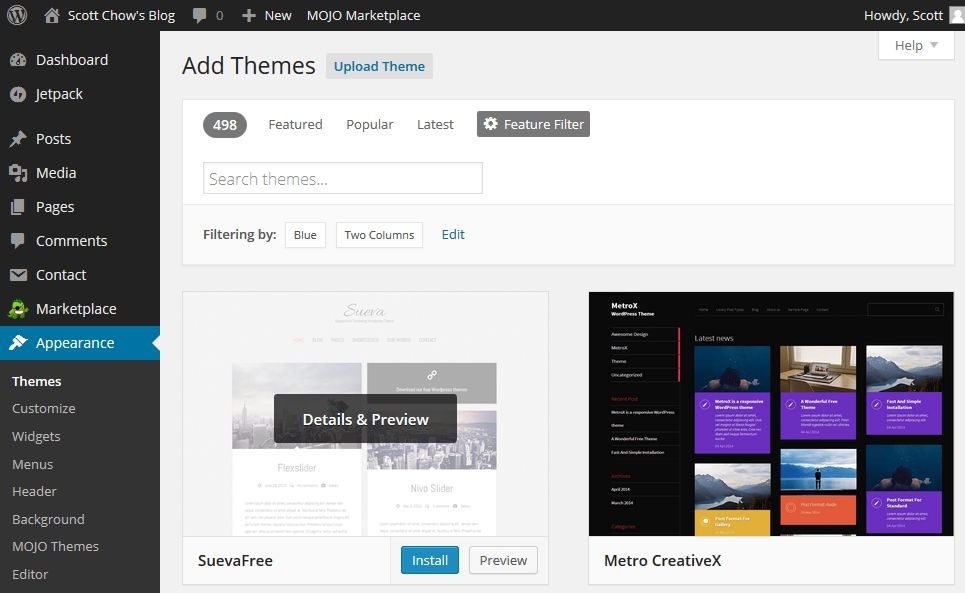
Once the theme is installed click “Activate” to activate the theme on your blog. To see your new theme in action, go to your site and take a look!
Creating Menus
The next step in the process is to create a basic navigation menu so that your readers can easily find important sections of your site by clicking on the links in the menu.
To do this, click on the “Appearance” tab on the left-menu of your blog administrator area. Then click on “Menus”.
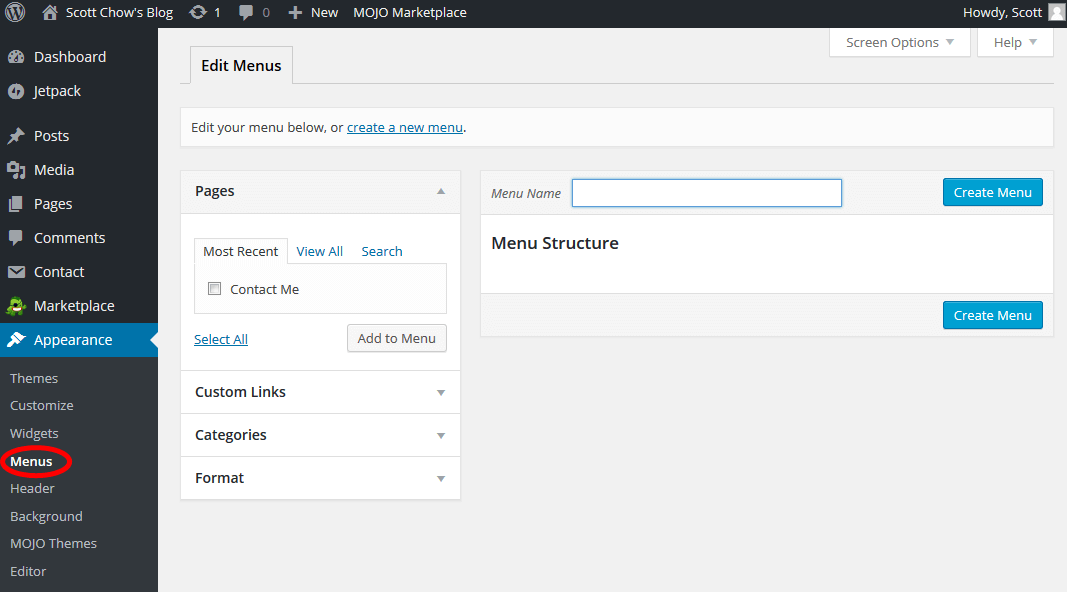
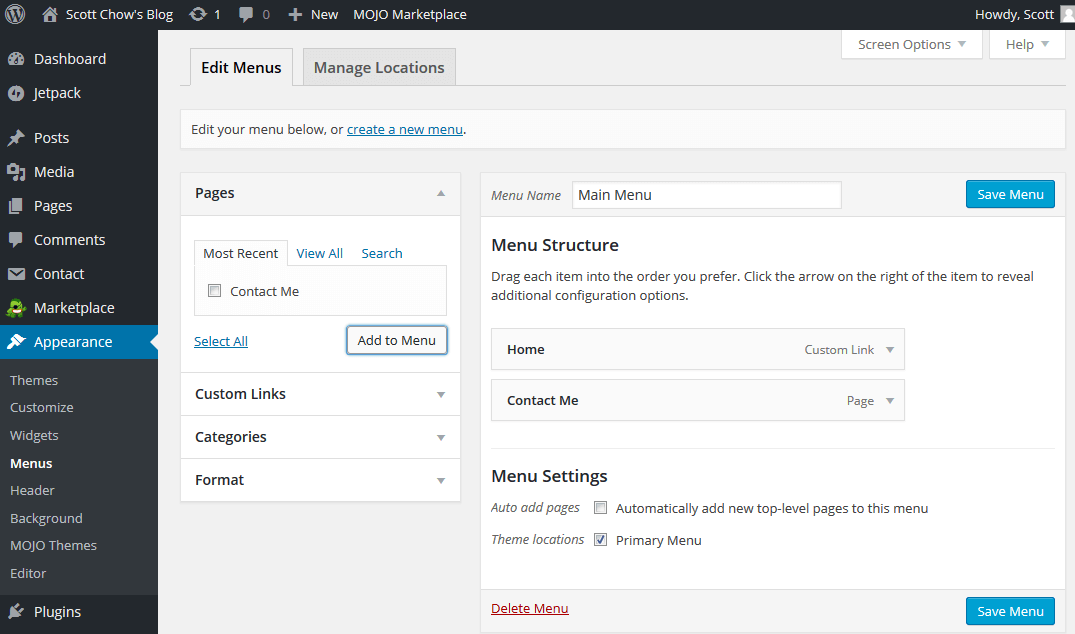
We are going to create a new menu called “Main Menu”. Go ahead and enter that name in the “Menu Name” box and then click “Create Menu”.
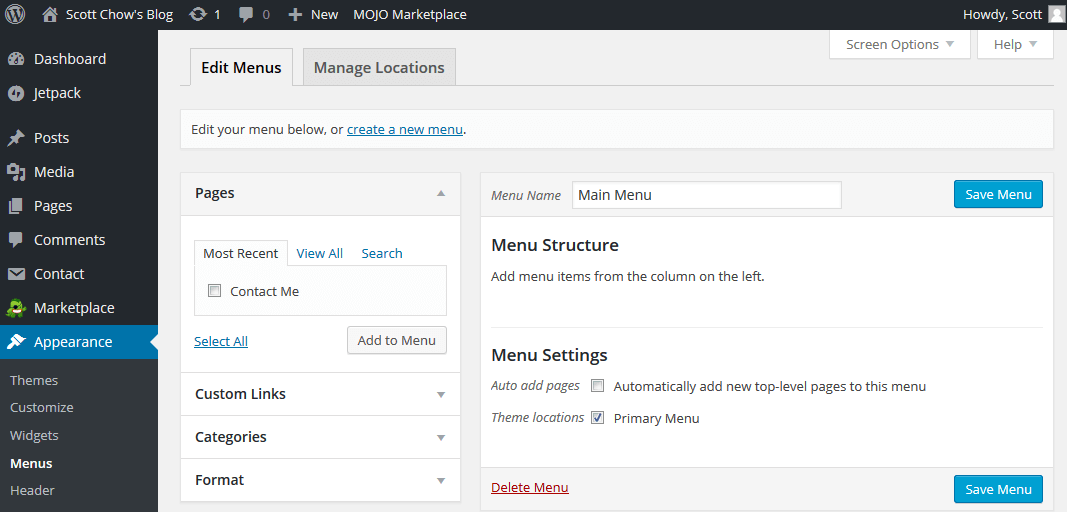
Now we can begin adding the items we want to this menu. For our example, I am going to start with adding a link to the homepage of my blog.
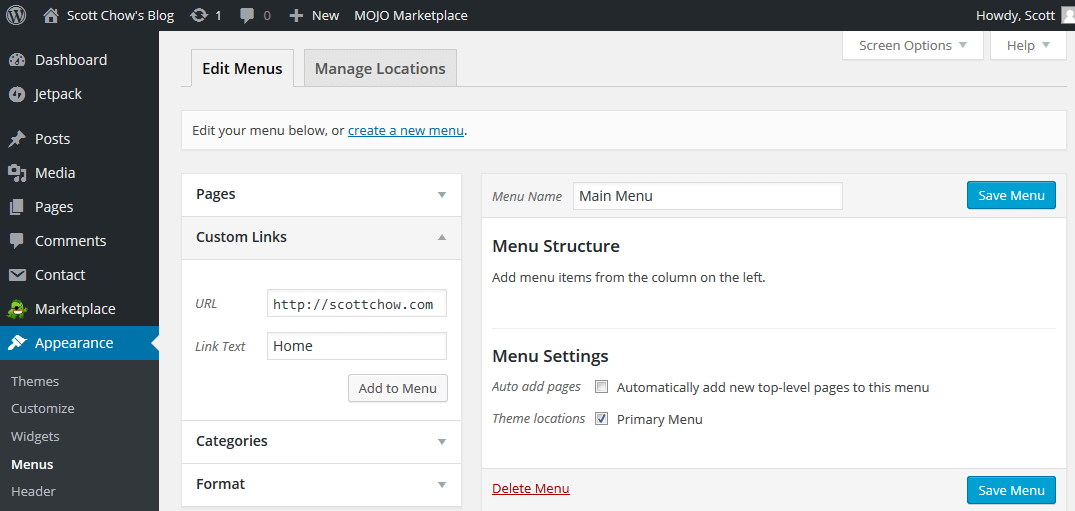
To do this I am going to click on “Custom Links”. Then I am going to enter the URL of my blog’s homepage. This is just your domain name with “http://” (without quotes) in front of it. In the case of our example I am using http://scottchow.com
You then need to enter in the “Link Text” which is the text you want to appear in the menu for the link to your homepage. I am going to call this link “Home”.
Once you have entered your URL and link text, click “Add to Menu”.
Let’s add one more item to the navigation menu for now. I am going add a link to a page that I created previously.
To start, click on the “Pages” section of the menu editor.
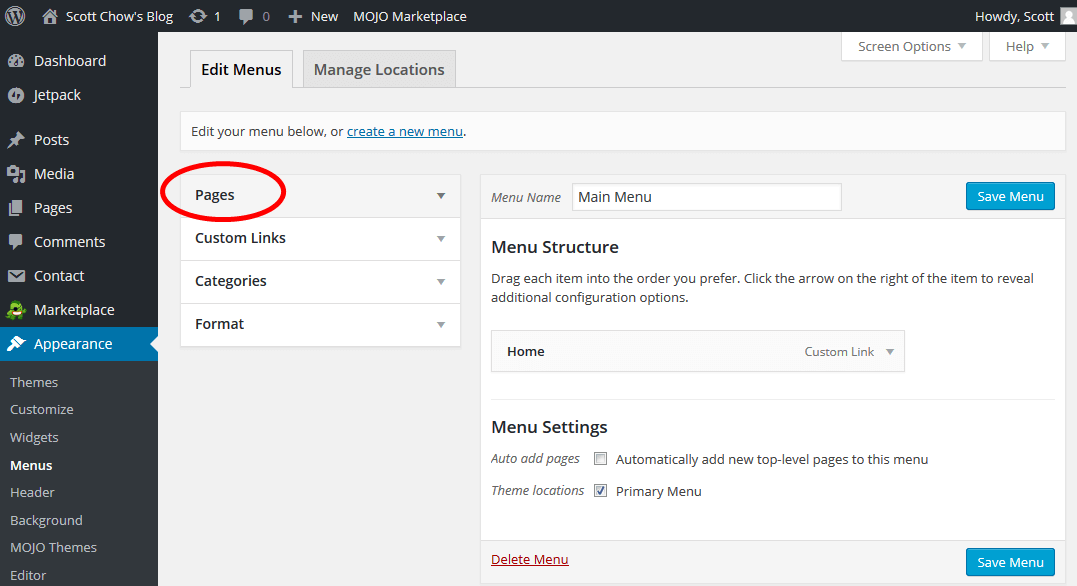
This will show me all of the pages that I have created so far. If you have not created any pages yet then this area may be blank or may show a “Sample Page”. In order to create a new page go to “Pages” on the left-menu of your blog administrator area and click “Add New”
The page that I want to add to the menu is called “Contact Me”, so I am going to click the checkbox next to that page and then click “Add to Menu”. Then I am going to click “Save Menu” to save the changes I just made.
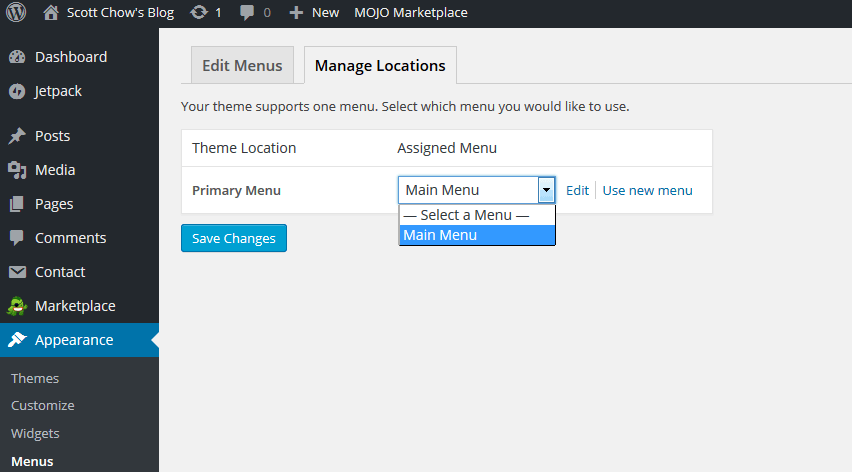
Now that I have created my menu I need to add the menu to my blog. To do this, click on the “Manage Locations” tab. In this example I want to add the menu we created (“Main Menu”) to the “Primary Menu” area. Just use the drop-down box to do this and click “Save Changes”.
Customizing Your Blog Design
Now that you have your basic blog design and navigation, you can further customize things to your liking. To do this, go to the “Appearance” tab on the left-menu of your blog administrator area. Then click on “Customize”.
This will bring you to a screen that shows you your blog homepage on the right, with the customization menu on the left. Important: If you are using a different theme than the one I am using for this example then your options for customization may vary slightly.

There are a variety of customizations you can do from this screen. Let’s take a look at them one-by-one.
Site Title & Tagline
This section allows you to change the title and sub-title that appear at the top of your blog. You also have the option to remove these entirely by unchecking the “Display Header Text” box.
Colors
Here you can change the text color of your header as well as your background color.
Header Image
With this option you can add an image to your header. Please note that each theme will have a different recommend image size for the header.
Background Image
If you want to use an image as your background instead of a solid color this section will allow you to do that by uploading the image you want to use.
Navigation
You can choose which of your navigation menus you want to use here. The menu needs to have been created already, which I show you how to do in an earlier step on this page.
Widgets
Widgets are various items that you can add to your blog sidebar menus. This section allows you to add and remove widgets from your sidebar menu(s). This is a little more complicated than the previous options, so let’s take a look at an example.
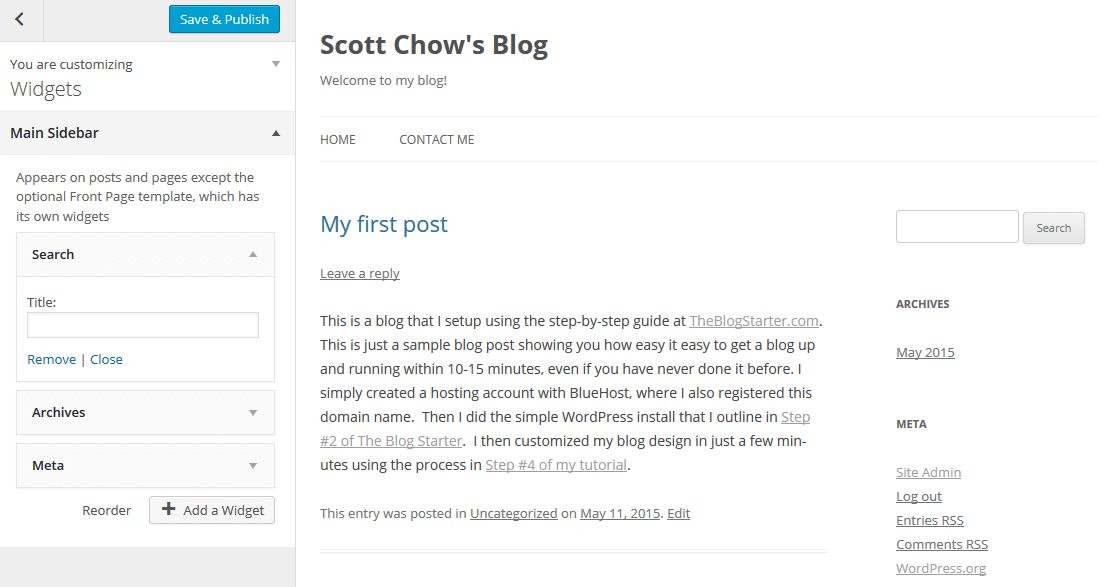
To start, click on “Widgets” and then click “Main Sidebar”. This will show you a list of the widgets that are currently being used in the “Main Sidebar” area.

You can see we have 3 widgets: Search, Archives, and Meta.
You can also see how those 3 widgets appear on your site, by looking in the right sidebar area. You can see that the Search widget creates a search box, the Archives widget shows a monthly archive of my posts, and the Meta widget shows a variety of links related to my blog.
I don’t want to keep any of these, so I am going to delete them one-by-one. To do that I just click the arrow next to the widget name and then click “Remove” to delete it.
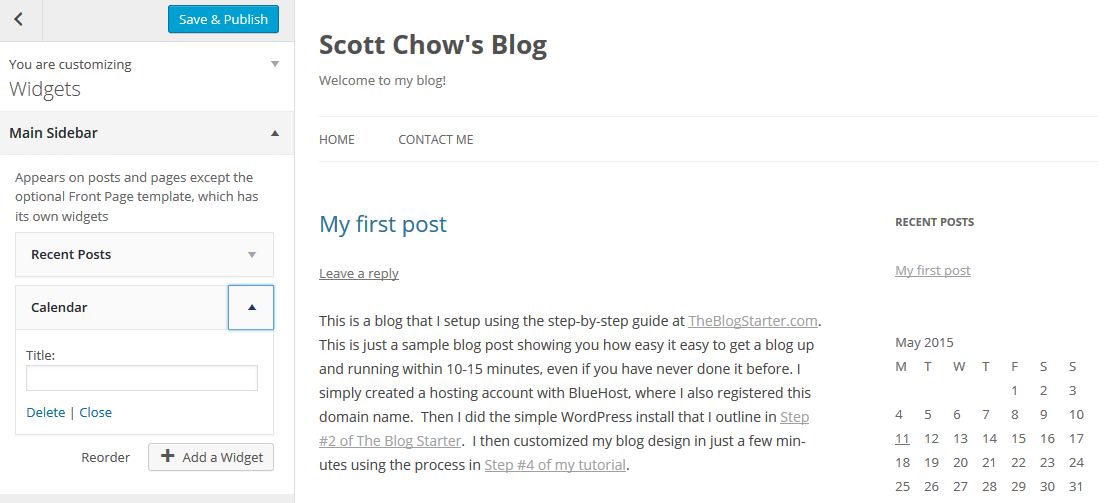
Now that I have removed all of those widgets I am going to add a few that I do like. To do this I click the “Add a Widget” button and select the widget I want.
To start with I am going to add the “Recent Posts” widget which will create links to my most recent posts in the sidebar area.

Then I am also going to add the “Calendar” widget which will show the current month’s calendar with the dates that I wrote posts on highlighted. Once that has been added, click the “Save & Publish” button.
There are a variety of other widgets you can add if you wish, so feel free to explore.
Adding Plugins
Plugins are additional tools that you can add to your WordPress blog from third-party developers. There are hundreds of free plugins available that can do just about anything on your blog.
There are plugins for creating contact forms, adding social media buttons, or enhancing your site’s visibility to search engines.
There are simply too many to list here, but there is one free plugin I believe every new blogger should start with called JetPack.
Jetpack adds a ton of easy to use features to WordPress like the ability to easily add images in your sidebar menus, publish your posts to Facebook, and see how many people have visited your blog.
As with all plugins, Jetpack is optional, and you can certainly blog without it. However, I have found that most bloggers benefit from the additional features that are included. Here is how to install it: How to Install Jetpack
Changing Your User Details
When first starting your blog it is important that you change your user details so that people know who is writing your blog.
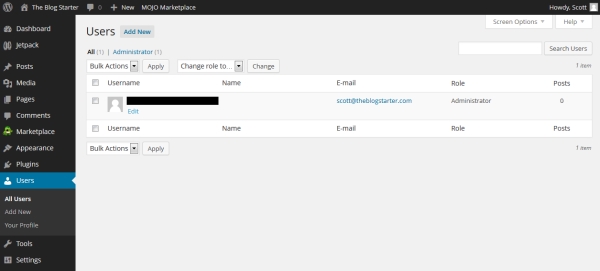
To do this, click on “Users” tab on the left menu. Then click on “Edit” under your username.
On the user details page you will want to at least change your Nickname and E-mail. Your nickname is the public name that will appear on all the posts you make, so keep this in mind when selecting it.
Simply type whatever you like in the “Nickname” box and then choose that same name in the drop-down box next to “Display name publicly as”. You can also change your email address if necessary.
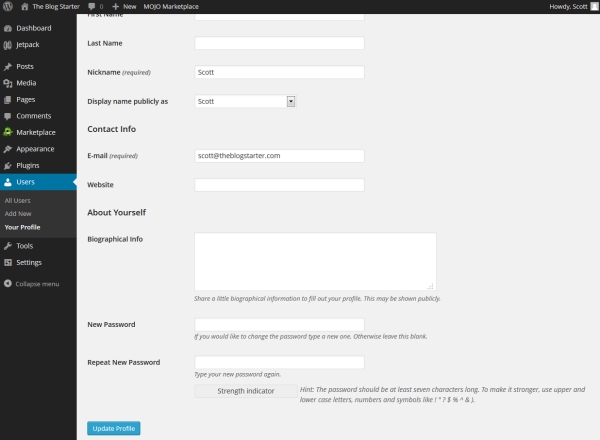
Once you have made all the necessary changes be sure to click the “Update Profile” button at the bottom of the screen to save the changes.
Changing Your URLs
Every time you publish a new post on your blog you are creating a new page with a unique URL. The settings for your URL names are known as “Permalinks”.
The default permalinks setting is not optimal in my opinion, as it gives you URLs with a bunch of numbers that look like this: https://www.theblogstarter.com/?p=123
To change that setting you need to scroll over the “Settings” tab on the left menu and then click on “Permalinks”. Then you can choose one of the options listed there.
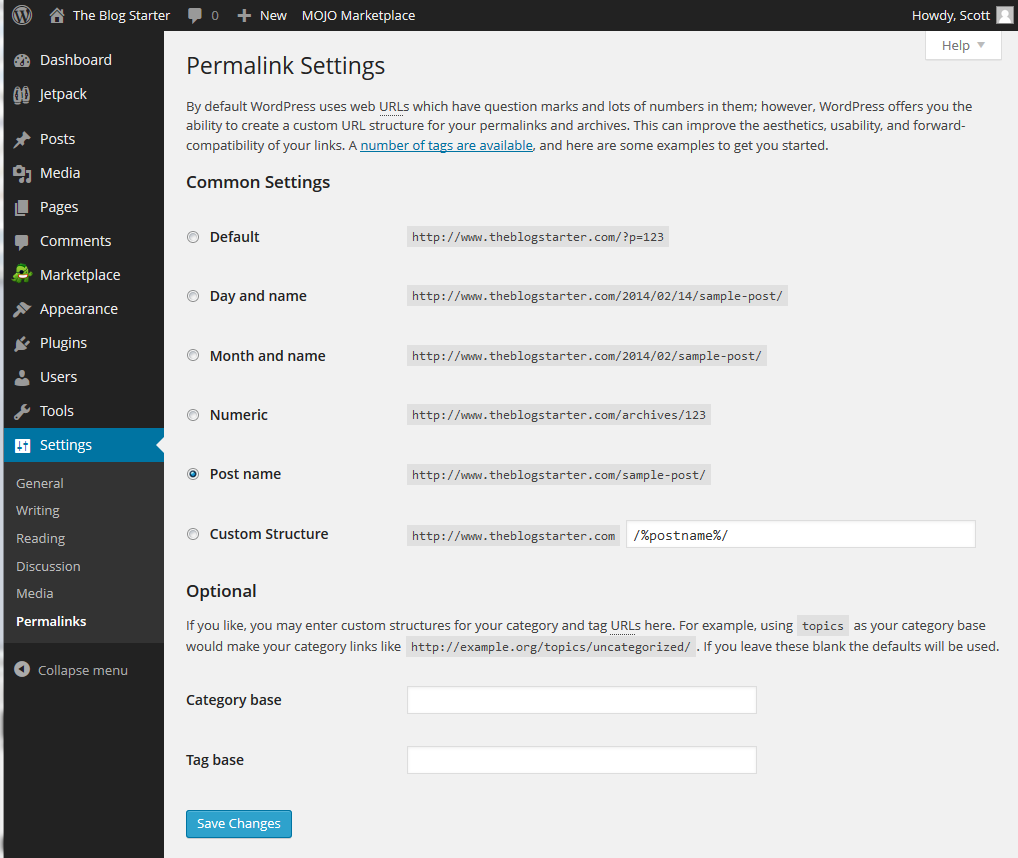
I am using the “Post name” setting on theblogstarter.com, but any of the options are perfectly fine and will not affect the usability of your site in any way. I just happen to think that the default permalinks setting looks kind of ugly.
Other Helpful Tutorials
If you would still like to make some additional changes to your blog before writing, here are some of my most popular tutorials:
1. How to add custom logos or images
2. How to see how many people are visiting your blog
3. How to automatically share your new blog posts on Facebook and Twitter
4. How to link to other sites from your blog
5. How to change text size and color
6. How to make your blog private
7. The top 7 free WordPress plugins
What next?
After completing this step you should have a functioning and attractive blog. Again, you can always go back and make additional changes later. There is no need to have everything perfect right away.
Now let’s get to the fun part – writing your blog!