1. Click here by July 4th to get the Fourth of July Sale price of $1.99 per month on BlueHost before it expires and then click “get started now”.
Disclosure: BlueHost compensates The Blog Starter when you purchase with this discount link, so all of my help is free of charge to you! Contact me if you have any trouble starting your blog.

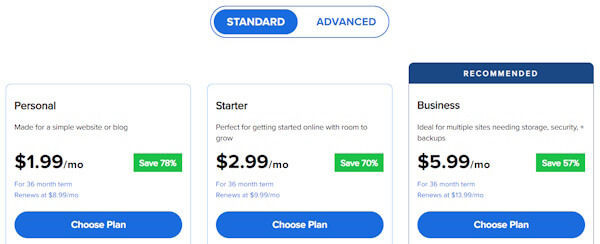
2. Select your plan. The Personal plan is the one I recommend for new bloggers. Click “Choose Plan” to select the Personal plan.
3. Type in your domain name in the left box and then click “next” to see if it is available.
- If you already own a domain name and want to use it for your blog, type your existing domain in the right box and then click “next”. Only use the right box if you have previously paid to register a domain!

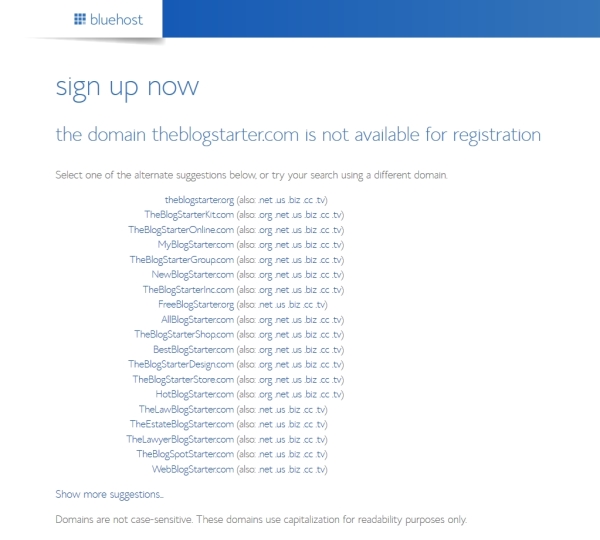
4. If the domain is unavailable you will be given a list of similar domain names that are available. You can choose one of the suggested domains or type in another name to try.
5. Once you have found an available domain name you will need to choose your hosting package and options.
- Selecting the 36 month package gets you the lowest per month price, while the 12 month package gets you the lowest up front total cost.

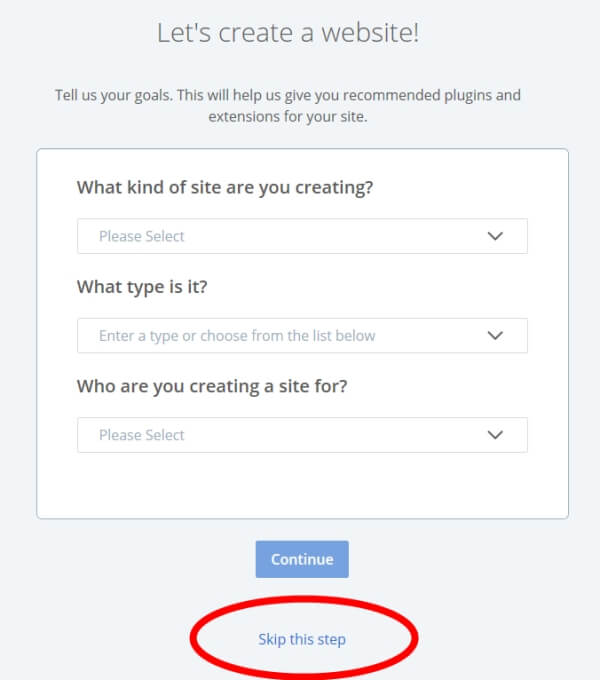
6. You will then be prompted to create a password for your account. When that’s done you can login to your account at BlueHost.com. You can then click “skip this step” on the next few pages.
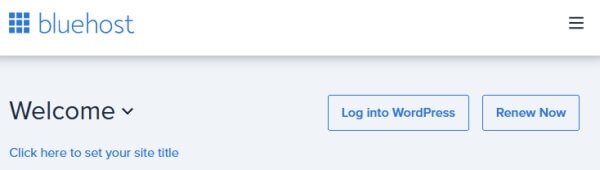
Your WordPress blog software will now be installed. When it’s finished click the “Log into WordPress” button to login to your blog.
Having trouble installing your blog? Get help here.
What’s Next?
Continue on to Step 3 of this guide to learn how to use your blog.