As your class blog begins to grow, you’ll probably want to start adding the most valuable commenters among your students to your blog so that they can start writing posts of their own. Once you have introduced your class to the world of blogging, you can either create accounts for them so that they can post on your class blog, or even have them set up blogs of their own. The process should ideally work in three steps: commenting, writing posts for the class blog and finally, setting up their own student blogs. This process allows your students to be progressively introduced to blogging so that they have an opportunity to familiarize themselves thoroughly with your rules and guidelines and the general best practices for publishing content online. We’ll take a look and creating additional blogs for your students in Chapter 6.
How to Add a New User to Your Class Blog
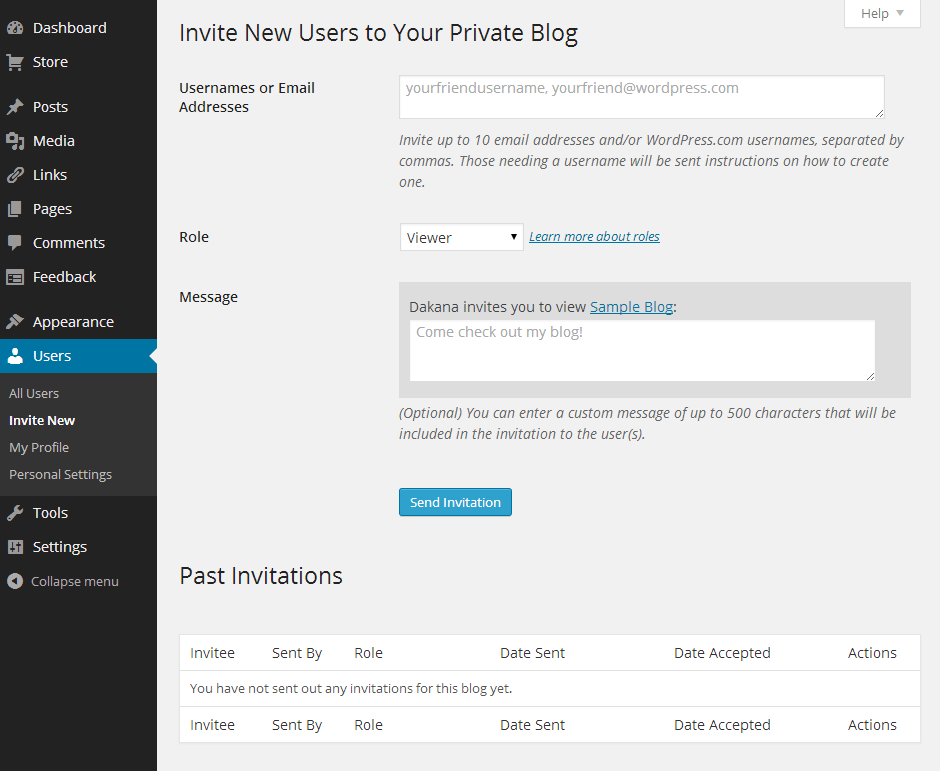
Adding a new user to your blog is a quick and easy process. Simply log into your administrator dashboard and navigate to “Users > Invite New”. Enter the email address for the user, and choose a role and an accompanying message before clicking “Send Invitation”. The recipient will receive an email from your WordPress blog including instructions on choosing a username and logging in for the first time.
Assigning Roles to Your Students
Before you jump into adding your students to your class blog, you’ll need to familiarize yourself with the various user roles available. WordPress provides five user rolls for new accounts: Admin, Editor, Author, Contributor and Follower. Since it is a class blog that you are operating, you’ll most likely want to use the roll of Contributor for your students. Those with Contributor accounts will not be able to change any settings on your blog or publish posts, but they will be able to write and edit their own posts before you decide to publish them. Typically, the only Administrator account will be your own, and you’ll have complete control over the blog, including the ability to add and remove user accounts, moderate comments and review and publish posts written by those with Contributor accounts.
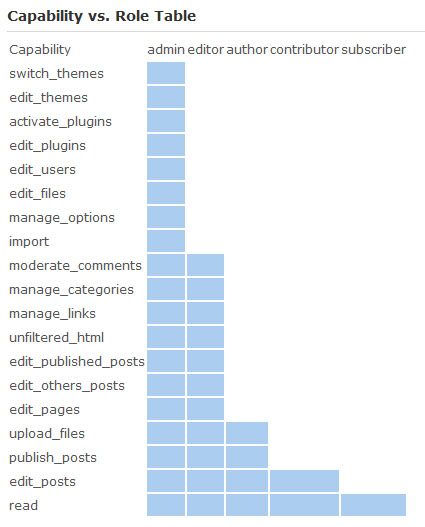
You may want to reward a valuable contributor by upgrading his or her account to an Author account. Author accounts provide all of the same features as Contributor accounts other than the fact that they can publish content without it having to pass the review of an Editor or Admin account first. Those with Subscriber accounts will only be able to post comments. See the screenshot below for a full list of user roles and their capabilities (note that some of the more advanced admin-only capabilities are unavailable with free WordPress hosting):
When you create an account for a student, you will need to provide his or her email addresses, since this will be used in comment moderation, newsletters and password resets.
Organizing Your Students’ Posts
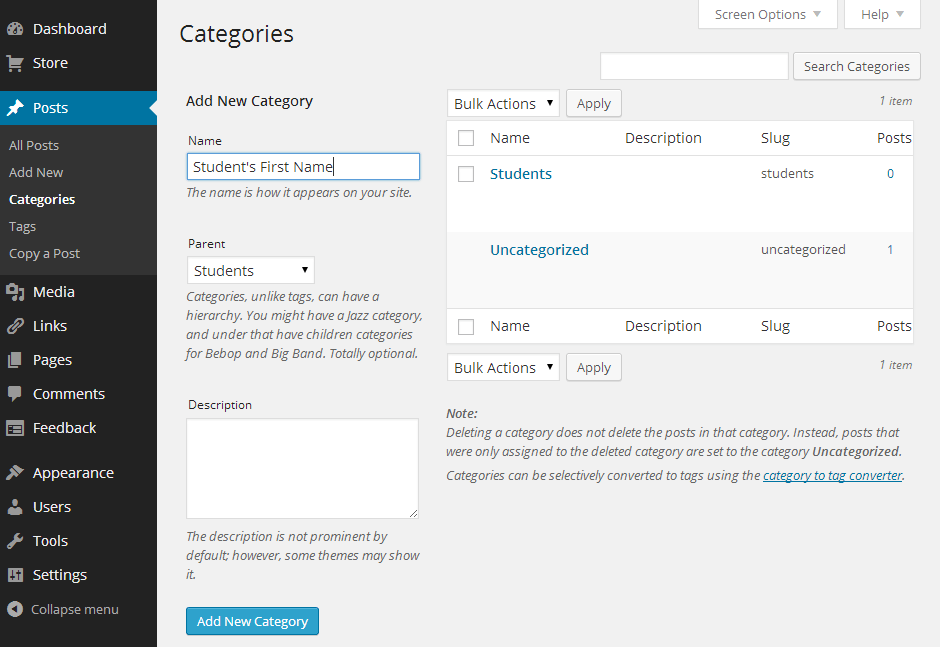
By default, the name of the poster should accompany the post itself. However, educators may also find it effective to assign categories to each individual student. To add a new category, navigate to “Posts > Categories,” and enter a name for the category, such as the name of the student, before clicking “Add New Category.” Alternatively, you can add each of your students as categories under a single parent category called “Students” or any other name you prefer. Once you have set up categories to help keep your posts organized, you should tell your students to select their names as categories whenever they create new posts.