1. Once your BlueHost account is setup (usually just a few minutes), you can login to your account by going to the BlueHost homepage and clicking the login tab at the top. Enter in your domain name and the password you chose when registering.

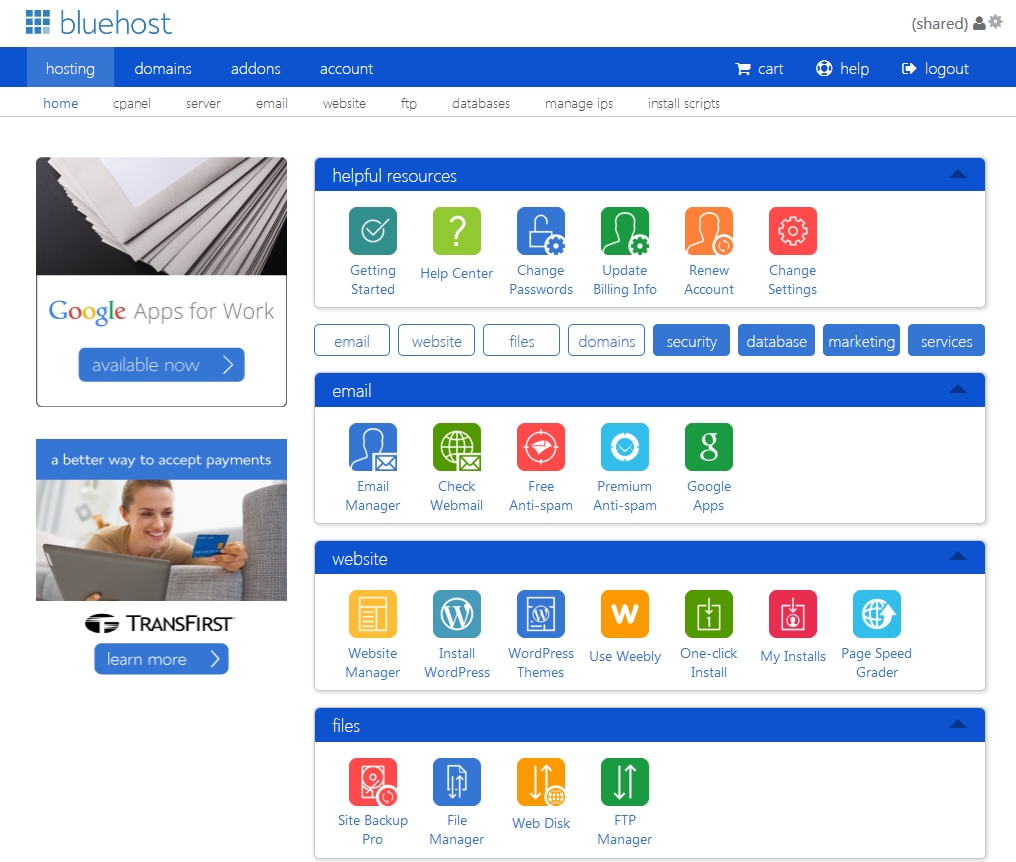
2. Now that you have logged-in to your account control panel, we can install WordPress, which is the software you will use for your blog. First, close any pop-up windows. Then look under the “Website” heading and click the “Install WordPress” link.
Too complicated? I will install your blog for you for free.
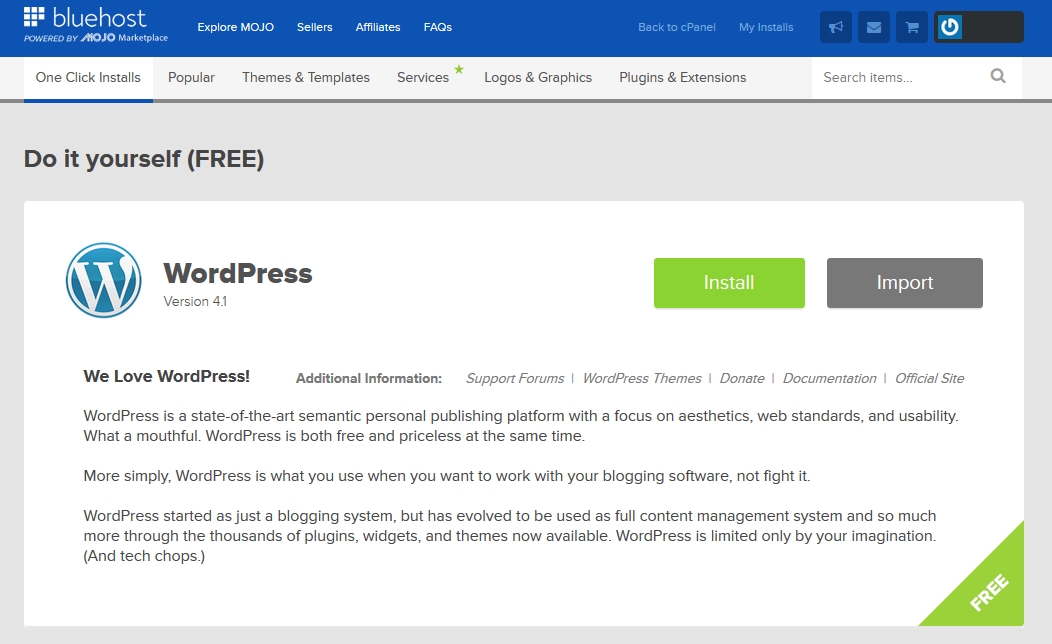
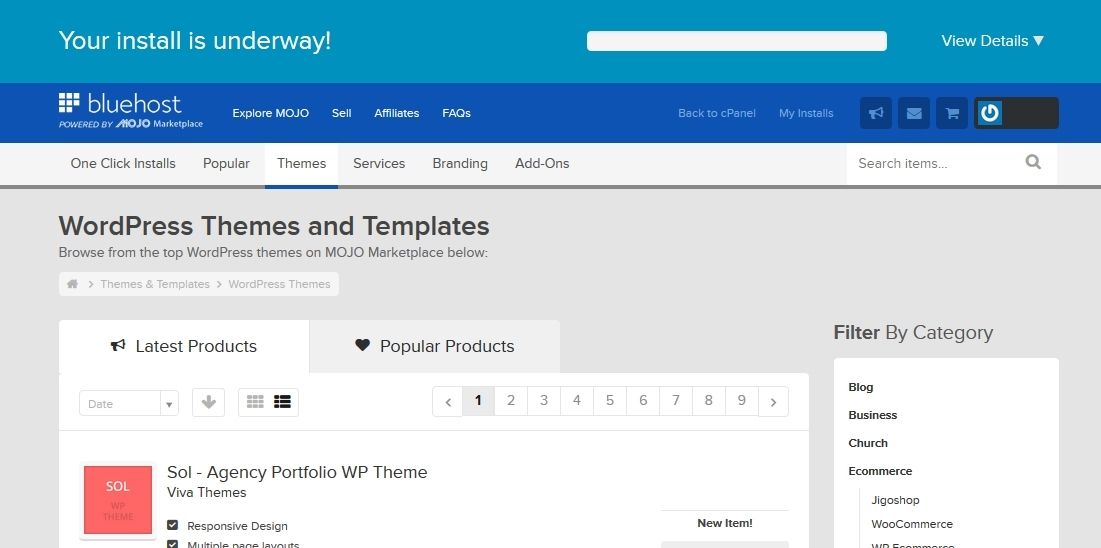
You will now be automatically logged-in to Mojo Marketplace and taken to the WordPress install page. Click on the “Install” button to get started.
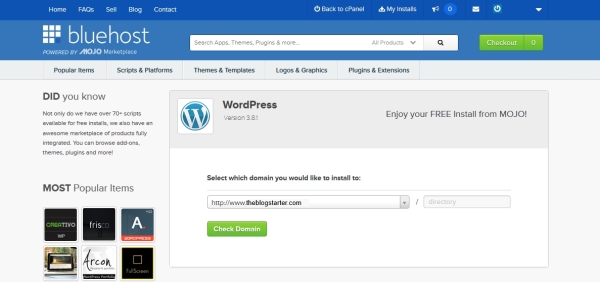
Select your domain and click “Check Domain”.
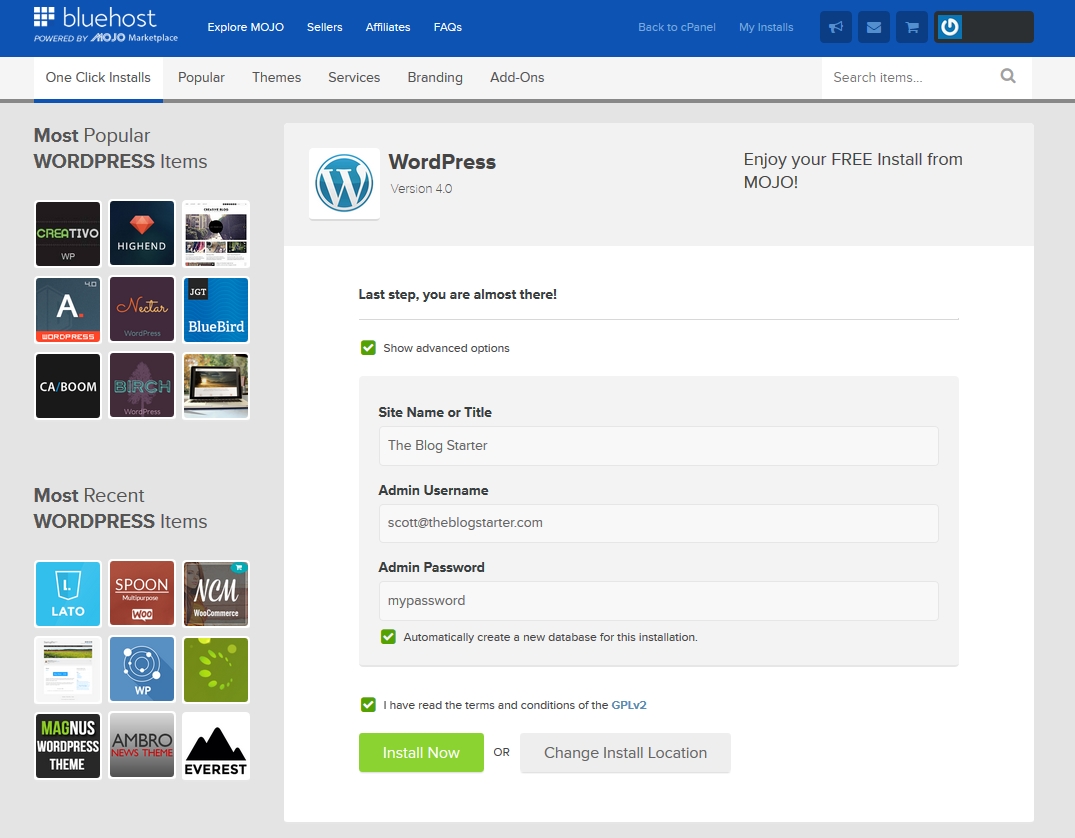
Check the “Show advanced options” box. Now you can enter in your site title, username, and password. These can be anything you want, and all of them except the username can be changed later. Make sure to write down your username and password so that you don’t forget them! When you are done, check the box to agree to the terms and then click “Install Now”
WordPress is now installing! This should just take a few minutes.
Having trouble installing your blog? Get help here.
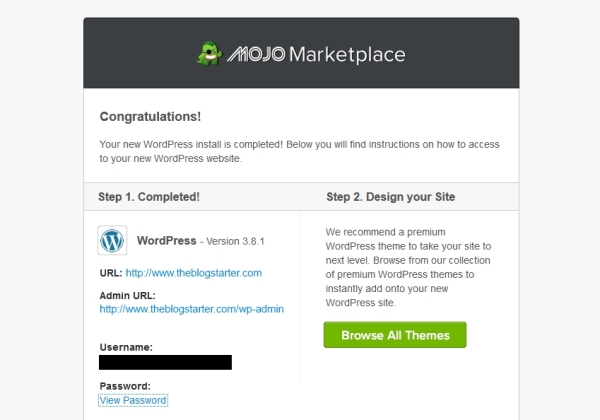
3. Once the installation has completed you can click “View Credentials” at the top of the page to see your login information. This info is only available for 12 hours, so make sure to write it down in a safe place!
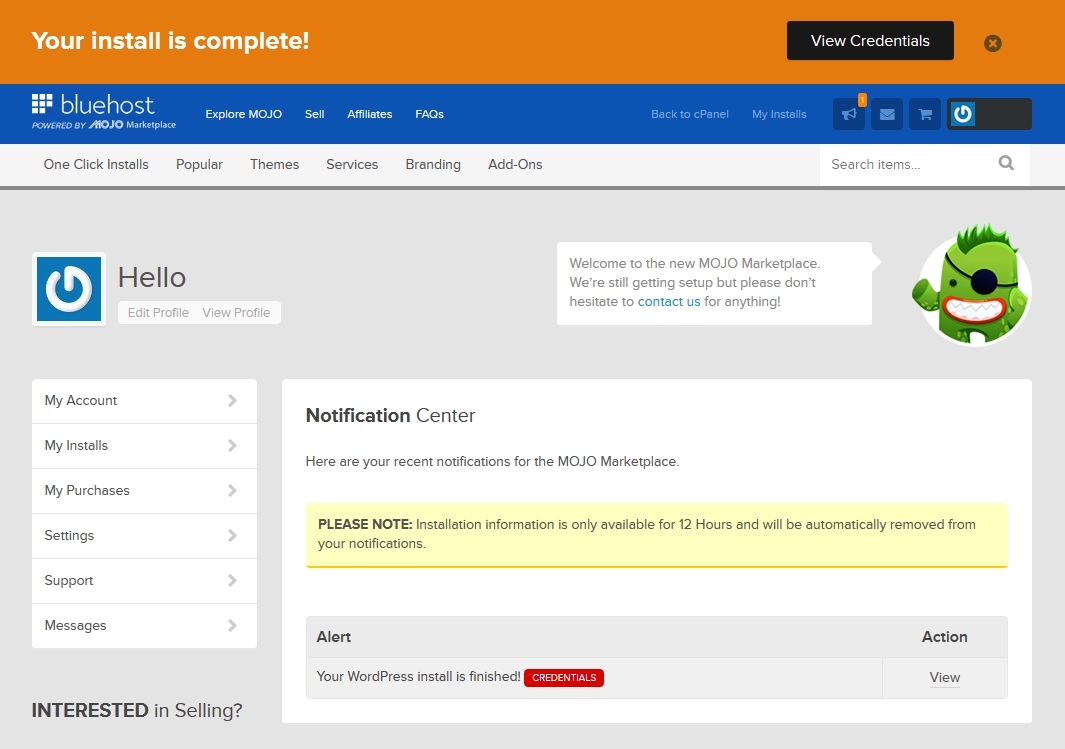
You will also receive an email with your login information as soon as the installation finishes.
Now that you have installed your blog it is time to learn how to use it. Step #3 of my tutorial will guide you through the process.