The theme you’ve chosen to represent your website often has controls in the WordPress customizer allowing you to design the main menu and header to your liking. But sometimes these controls don’t provide everything you need to really make your menu stand out.
Here are some stand-alone tips and tricks to implement to make your main menu look amazing.
Display Hierarchy With a Dropdown Menu
Displaying your menu in a traditional dropdown format is a built-in feature with WordPress. Almost every theme will be compliant with the dropdown feature, enabling you to provide your end users with an easy-to-understand navigation system that helps them find what they’re looking for quickly.
In the backend of WordPress under Appearance > Menus, you can add the selected pages from the left to your main menu on the right. To have selected pages show within a dropdown under another selected page, simply move that page by dragging and dropping it slightly to the right under the selected item.
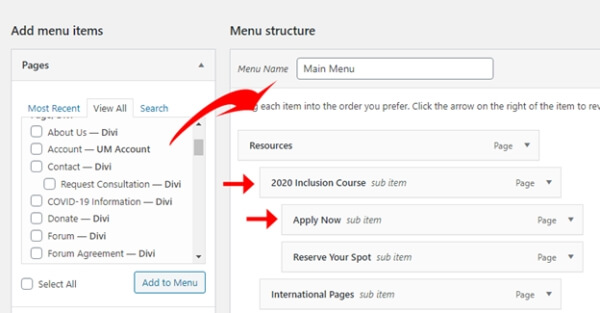
You can make your dropdown even deeper by adding another item under the first dropdown, indenting this item as well, to increase the hierarchy. The above example would look like this on the live site:
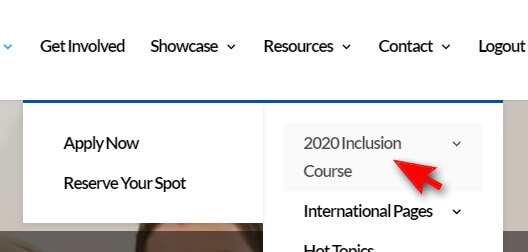
Hovering over Resources drops down to the next set of menu items, and hovering over the first item displays the next set of items to the left.
**Note: How your dropdown displays is theme dependent.**
Add Icons to Your Menu
Adding Font Awesome icons to your menu is easy to do and makes your menu stand out!
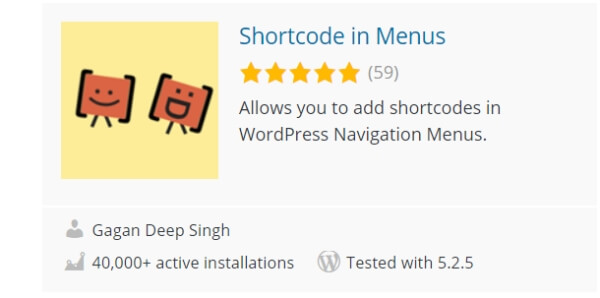
First, download and activate the Shortcode in Menus plugin in your plugin manager.
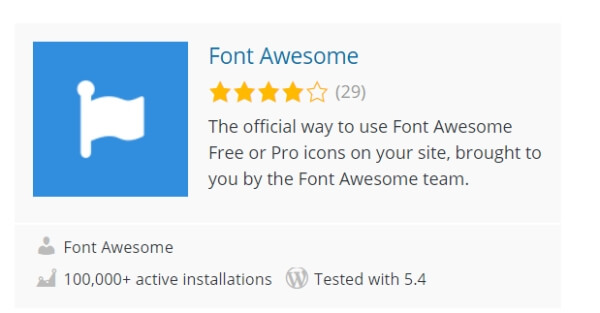
Then download and activate the Font Awesome plugin.
Now it’s time to search for the icons you want to appear in your menu. Go to the Font Awesome website and search for an appropriate icon.
Click on the icon you like and notate the name of this icon. Now, back in your menu settings, add the icon shortcode from the Font Awesome plugin to the navigation label for any menu item.
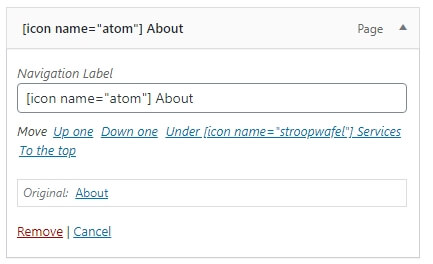
You can add the shortcode before or after the menu item name. Replace the code below with your page name and your icon name.
[icon name=”your-icon-name-here”] AboutDon’t forget to save!
Make Your Menu Sticky
A sticky menu adheres to the top of the pages as the end user scrolls. This keeps the navigation at the user’s fingertips. Many themes will provide a sticky header as an option, but in case that option is not available, you can make your menu sticky with some custom CSS.
In your dashboard, head to Appearance > Customize. Click “Additional CSS” and add the following code:
#main-menu {
   z-index:199;
   margin:0 auto;
   border-bottom:1px solid #000000;
   width:100%;
   position:fixed;
   top:0;
   left:0;
   right:0;
}
Replace #main-menu with the CSS class of your navigation menu which will differ depending on your theme. You can find the class by hovering over your menu and right-clicking on “Inspect”.
If you would rather not deal with CSS, you can simply install the plugin My Sticky Menu for an easy, plug-and-play option to create a sticky menu.
Show/Hide Menu Items Based on User
The most common example of this would be to show a Login and/or Join Now tab in the menu for non-logged-in users, and a Logout tab for logged-in users while any Login or Join Now tabs are hidden for the logged-in user.
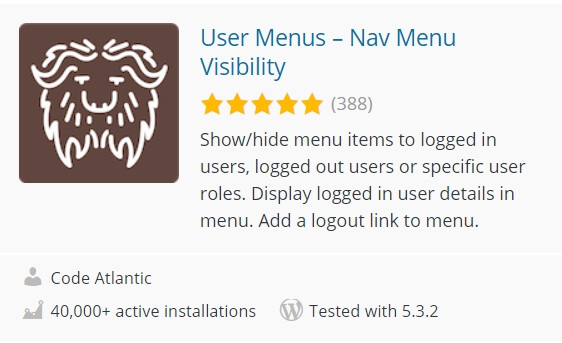
In the Plugin Manager of the dashboard, download and activate User Menus – Nav Menu Visibility.
Back in your menu settings, you can create your Login, Join Now, and Log Out Buttons. You may have a separate page for a user login and for joining. For a Logout Button, create a menu item using the “Custom Links” selection.
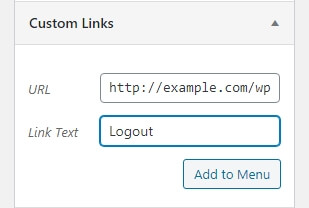
The universal WordPress logout link to add is:
http://yourdomain.com/wp-login.php?action=logoutMake sure you use your domain name and the correct http version (http vs https).
Once you have these tabs created, you can hide or show them based on the user’s state. Under “Who Can See This Link?”, choose a Logged In or Logged Out User.
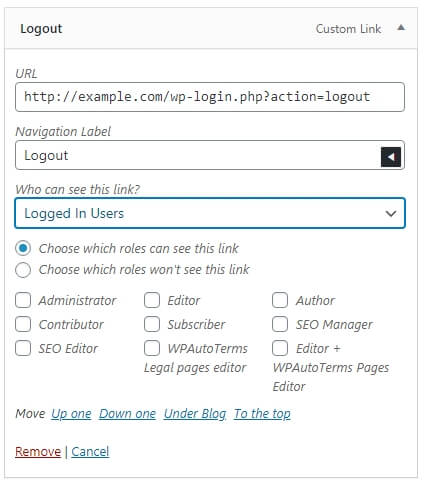
Membership sites can hide or show menu items based on user role for further visibility options.
Add Hover Effects
A hover effect can change the menu item tab text or background color – or both! All you need to do is add some custom css in Appearance > Customize > Custom CSS. Here is an example:
#main-menu li.menu-item a:hover { background-color:#ffe6f2; color:#cc0066; border-radius:5px; border: 1px solid #cc0066; padding-top: 20px; padding-bottom: 20px; padding-right: 10px; padding-left: 10px; Margin-bottom: 10px; }Replace #main-menu with the CSS class of your navigation menu which will differ depending on your theme. You can find the class by hovering over your menu and right-clicking on “Inspect”.
The example above would produce this hover effect when hovering over the Portfolio tab.

Customize a Single Menu Item
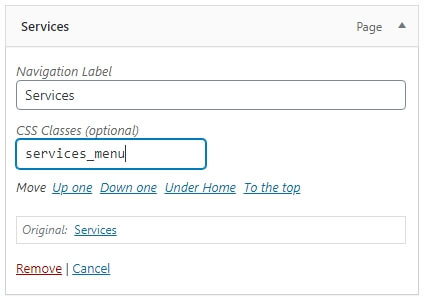
You can easily create custom CSS for a single menu item by assigning that menu item a CSS class. In the menu settings, click on Screen Options at the very top right of the screen.

Tick the box for CSS Classes which is unchecked by default. Then save the menu settings.

There will now be a new text box underneath each menu item. Here, you can assign a different CSS class for each and every menu item. In this example, we added the class “services-menu” to the menu item “Services”.
Now you can add your custom CSS to Appearance > Customize > Custom CSS section. I can use the same CSS above using this class.
**Note: You would not need to add li.menu-item as an identifier since you have already assigned an individual class.**
.services_menu a:hover {
  background-color:#ffe6f2;
  color:#cc0066;
  border-radius:5px;
  border: 1px solid #cc0066;
  padding-top: 20px;
  padding-bottom: 20px;
  padding-right: 10px;
  padding-left: 10px;
  Margin-bottom: 10px;
}
This produces the same result as above, but only for this menu item.

Final Thoughts
We hope you enjoyed this compilation of unique tips and tricks to customize your WordPress menu. Have you tried some of these ideas? Do you have other favorite tricks you like to employ? Let us know in the comments below!