Below you will find articles for the intermediate and advanced blogger. If you are a beginner make sure to check out my easy guide to starting a blog first.
Blogging has evolved perhaps more quickly than any form of writing before it. While The Blog Starter is geared towards helping up and coming bloggers create their blogs and websites to define the future of the internet, I feel it is also important for contemporary bloggers to have a sense of how blogging began as they start their own blogs. To help with this, I set out to get the perspective of a man credited as one of the first personal bloggers on the internet. The following is based on an interview conducted with blogging legend Justin Hall.
Chicago-born Justin Hall is a true original. In 1994, he launched a webpage known as Justin’s Links From The Underground. The page was one of the first personal blogs on the internet and it quickly became focused on sharing details of Hall’s life with his readers, who were primarily his fellow students at Swarthmore College.
At the time, widespread public internet use was still an emerging trend, and it was taking hold much faster on college campuses than in other places. Reflecting on that time, Hall says that “I couldn’t just call my mom and tell her to load up the page…at college, it was easy.”
This access created a unique bubble where Hall could share his life primarily with people in his peer group. This type of soul bearing wasn’t new to Hall though, and from an early age he found value in truth and transparency.
Speaking of his teenage years, he says that “I used to take my journal and hand it to people. The rule was that they could read any page they wanted, but they had to write something as well.”
It is not hard to imagine this as an analog precursor to blogging, with the blogger sharing his life and thoughts with an audience that is free to respond back, similar to a modern day comments section.
Though he is often cited as one of the originators of personal blogging, Hall remains modest. As far as his reasons for starting the page in the first place, he says “I was so enchanted by the notion of personal honesty on the internet.”
This attitude helps explain how he arrived at blogging as a way to express himself, well before it was popularized. Of course, personal blogging is a double edged sword and often puts the blogger in a position to share things with his audience that might be sensitive or personal.
Reflecting on his early years in blogging, Hall says that “There were times where it was clear that I had crossed a personal boundary with someone.” In those cases, he would work to patch things up interpersonally rather than opt to remove content altogether.
When I ask him about the role of personal blogging today, when so many facts are up for dispute, Hall remarks that “Now it is tough to know what a true personal voice on the internet is anymore.” With so many bloggers purposefully obscuring their motives, he certainly has a point. Not too mention the commercial element of many modern-day websites that has lead to the advent of things like advertising networks, website building software, and e-commerce.
Ultimately, he says, “The conversation is crowded.” It is clear from speaking with him that he doesn’t view this an impediment though, but rather an invitation for the next generation of voices to take hold on the internet.
Though he helped set the stage for blogging in the form that we know it today, Hall is excited to see where it goes and how blogging continues to evolve.
Each day I receive dozens of personal emails from my readers, who email me directly after reading my tutorial on starting a blog. Sometimes they need a little extra guidance from me and sometimes they just want to write me a note to say thank you for putting together my easy-to-use guide.
While I love hearing from all of my readers, I have to admit that one of my favorite emails that I receive typically reads like this:
Dear Scott,
I am a stay at home mom looking for a way to contribute some additional income to my household. I think blogging might be a good way to accomplish this. I stumbled across The Blog Starter guide and it all sounds great, but I am looking for a little help in choosing the right topic for me to write about.
Can you possibly give me some guidance? I am excited to get going and know that I can make this work for me and my family!
Thank you,
Future Mommy Blogger
Wow! Wouldn’t you be excited if you received that email? The writer’s passion and excitement is obvious and comes across in almost every word.
This kind of person really inspires me and is the whole reason that I started The Blog Starter. When I began The Blog Starter, my goal was to help make blogging easier and more accessible for everyday people. That is why I love interacting with aspiring bloggers who are stay at home moms. They truly are some of my most passionate readers, and many of them have gone on to become successful bloggers.
With that in mind, today I am going to dedicate an entire article to why stay at home moms, like the ones who write me emails looking for advice, love blogging so much. In the process, I will review how stay at home moms can generate income from blogging as well as include some information about the amazing online community of mom bloggers and how blogging makes for an ideal outlet for self expression.
Why Blogging Is a Perfect Fit for Stay at Home Moms
First and foremost, the flexibility that comes with blogging is an extremely good fit for stay at home moms and their hectic schedules. Stay at home moms are pulled in a million different directions throughout the day, and sometimes all at once! This means that maintaining a job, even one with working from home flexibility, can be tough thanks to the difficulty with sticking to a rigid schedule.
Blogging solves all of these scheduling issues. You can blog from anywhere in the world at any time. Even the everyday maintenance that comes with a blog is rarely urgent. While I always encourage my readers to stay active with their blog and produce as much quality content as they possibly can with consistent updates, as a blogger there is nothing wrong with taking a day off every once in a while as needed.
Best of all, stay at home moms who blog often find that they have a built in audience: other stay at home moms! Being a stay at home mom is truly a unique life experience as well, and the perspective that comes along with that is valued across the internet.
Of course, there are plenty of topics that a stay at home mom can blog about other than her family. I have worked with stay at home moms who have launched blogs about food, martial advice, celebrity gossip and a large range of other topics. Put simply, choosing what your blog is about is entirely up to you. Read on to learn more about how you can express yourself with a blog.
Blogging For Self Expression
One thing I hear over and over again from my readers who are stay at home moms is how useful blogging can be as a way to express themselves. This is no surprise, considering that blogging was originally started as a way for people to simply keep an online record of their lives.
Stay at home moms often spend a lot of their day communicating with and caring for their kids, so blogging can be a welcome escape back into the adult world. Blogging helps connect you with people, both nearby and from across the world, who are interested in the same things you are. In fact, many bloggers end up forging meaningful connections with both their readers and with other bloggers.
If you are interested in making your voice heard, whether it is on topics like politics and religion or just sharing some fun stories from your home life, then I would definitely give blogging a shot. Even better, a blog that you create is completely yours and you do not need to worry about impressing anyone else with your site.
Even better, blogging also comes with the potential for generating income that can be a meaningful addition for any household. Keep reading to learn more about how you can make money from blogging.
How Stay at Home Moms Can Make Real Money From Blogging
If you want to learn more about how to generate income from a blog, I recommend reviewing step #7 of my blogging guide which shows you how to make money from your blog. That guide has comprehensive details to walk you through how to get set up with Google’s AdSense program and begin making advertising revenue from your blog right away.
Ultimately, the key to success in generating income from your blog as a stay at home mom is to build up the largest audience that you possibly can. There are a number of good ways to do this, including optimizing your site to ensure it shows up as high as possible in Google search results and reaching out to other bloggers to coordinate a “link exchange” where you exchange a link to their blog on yours in order to have them do the same. This then helps to build an audience for both blogs.
One of the most common questions I receive is “How much money can I really make from blogging?” The answer truly is “It depends.” It depends how much time and energy you are willing to invest into your blogging. It depends how much your words and other content connect with readers. And sometimes it depends on being discovered in the right way that helps you develop an audience.
Sometimes readers can feel a bit overwhelmed by this process of building a readership, and it might even seem like a lot of work. Ultimately the best way to grow the amount of money your blog generates is simply to create the best content you can. Creating blogs that people are interested in discussing and sharing with others is the “hard” part, but the good news is that it is also the fun part!
This is also why I recommend that my readers choose a topic that they are passionate about when they go to start their blog. If you choose to write about something that is important to you then you are much more likely to stick with it and to enjoy the process of growing your blog from the ground up.
The Mom Blogger Community
Another amazing benefit of starting a blog as a stay at home mom is the robust mom blogger community that already exists online. While there are a number of excellent resources just a quick Google search away, I would absolutely recommend that any new mom blogger joins whichever site fits best with their personality.
Forums like Mom Bloggers Club are full of people just like you giving each other advice, support and all sort of other helpful tips. In fact, this can be a great way to foster an initial audience for your blog, as well as a place to get firsthand advice from bloggers just like you who are already successful.
The sense of community among mom bloggers is unlike almost any other part of the internet. This community helps even shy beginners find a place to connect with other bloggers and get their blogging career off on the right track. It also helps give you a place to get questions answered, from basic questions like which plugins to use to more complicated questions like how to promote your blog.
When the internet was experiencing its first big boom back in the 1990s, building a website required serious technical knowledge. At a minimum, you needed to be fluent in programming languages such as HTML, CSS and Javascript just to build a simple website. These days, almost anyone can create a beautiful and fully functional website with little or no technical knowledge using a content management system (CMS).
A great CMS choice for both first-timers and experienced web developers is Joomla, an award winning open-source CMS that has been in development since 2005. It currently powers over 2 million websites in 68 different languages, and is managed by a team of more than 1000 dedicated volunteers. Joomla is a stable and secure platform that is so easy to set up even the most inexperienced users can have a fully functional website up and running in less than an hour. Joomla comes with more than 10 thousand free templates and extensions, so whether you’re looking to build a personal blog, a company website or an e-commerce store, it’s easy to create a website tailored specifically for your needs.
This guide will provide you with simple instructions for setting up your own Joomla website. It will show you how to install Joomla on a hosted web server, how to create a blog, how to make your first blog post, and how to customize your site using templates and extensions.
Getting Started
Before you install Joomla, you’ll need two things – an address for your site (a domain name) and somewhere to install the Joomla files (a web hosting service).
If you already have a domain name and hosting service, feel free to skip straight to step 4.
Choosing A Domain Name
Choosing an appropriate domain name is an important step in creating your Joomla website. If you’re just creating a blog to share with friends and family, your choice of domain name doesn’t matter so much. However, if you’re planning to create a site for your business or are hoping to attract visitors through a search engine, it’s important to choose a domain name that reflects your brand, has the right keywords, and is easy for people to remember.
Here are some tips for choosing a great domain name:
Keep it as short and simple as possible. Longer domain names are usually harder to remember. Long domain names also increase the risk of misspellings and mistyping.
Avoid words with multiple spellings as they can confuse your visitors. For example, if you’re creating a blog about socks, topwoolsocks.com is a much better choice than topwoolsox.com.
Try to include keywords in the domain name to help improve search ranking and make it easier for visitors to find your site. For example, if you’re creating a blog for your car washing business, try to include the phrase “car washing” as well as the location of your business (eg. atlantacarwashing.com).
If possible, choose a .com top level domain (TLD) extension. You might be tempted to choose one of the new TLD extensions such as .club, .tips or .online, but these extensions will often make it harder for visitors to find your site. Most people are so used to .com extensions that they’ll type .com without thinking.
Before registering a domain name, you need to make sure it’s available. There are a number of domain name search engines that show you available domain names, available extensions, the cost of registering the domain, and suggestions for similar domain names if the one you want is already taken. A popular domain name search engine can be found at Name Fresh.
Once you’ve found a great domain name, you’ll need to register that name with a registrar. Registering a domain name is like renting a house – you’ll never actually own the domain, but as long as you keep paying the yearly registration fee you can keep using the name indefinitely.
Many web hosting companies offer domain name registration as part of their service. Registering a domain name with your web hosting company is usually the easiest option as the domain should be automatically configured for use with your site.
Finding A Web Hosting Service
Every website on the internet is simply a collection of code stored on a server somewhere in the world. When you visit a website using a browser, you’re actually connecting to that server to read and interact with the code stored there.
To create your own Joomla website, you’re going to need a place to store your code, and that’s where a web hosting service comes in. There are hundreds of web hosting companies offering similar services including shared hosting, VPS hosting, dedicated servers, unlimited disk space, unlimited email addresses, free domain names for the first year, and easy setup. Hosting fees usually start at just a couple of dollars per month for the cheapest plan, which should be more than adequate for the average user.
Here are a few tips for choosing a web hosting service:
Look for a company that offers 24/7 dedicated customer support. If your site suddenly goes down, you want to be able to get it back up and running as quickly as possible. It’s a good idea to check customer reviews and feedback to make sure their support performs as advertised.
Choose a company that guarantees at least 99.9% uptime. If you’re running a web based business, every second your site is down could lead to lost revenue.
Check that the company has an easy to use control panel with an Auto Script Installer such as Softaculous, Installatron or Fantastico. As you will see below, it’s not impossible to install software without an auto installer, but it definitely makes it much easier.
If you’re not ready to pay for web hosting, Joomla offers a free, slightly modified version of the CMS at the joomla.com website. They will host your site for free and give you a free subdomain. Users are limited to a small selection of extensions and themes, and have limited mailing functionality. This free service is a good starting point for beginners wanting a simple, personal site.
Installing Joomla
There are two main ways to install Joomla – one-click installation using an auto script installer, or downloading the Joomla source files and installing them manually.
If you have an account with one of the major web hosting services, you should have the option to automatically install Joomla. This is the option we recommend as it makes installation much easier.
If you don’t have this option, don’t worry – we’ll show you step-by-step instructions for manual installation.
NOTE: The screenshots you see here may be slightly different from yours depending on which web hosting service you use, but the installation process should be almost identical.
One-Click Installation
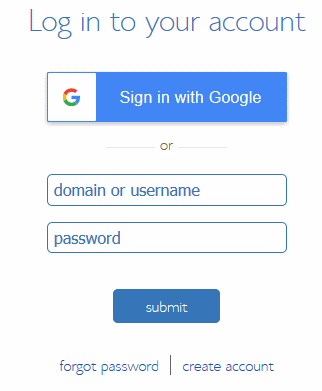
The first thing you need to do is log into the control panel for your web host. Your hosting company should be able to provide you with the address, your username and your password.
For this example, the web host is using the popular cPanel control panel.
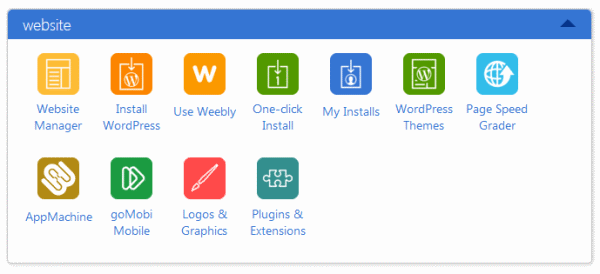
Once you’ve logged into cPanel, scroll down to find your software installer. This web host is using the Softaculous installer. Click on the installer.
You can use the search bar to find the Joomla software, or you can look for it under the CMS
menu. Once you’ve found Joomla, click the “Install” button.
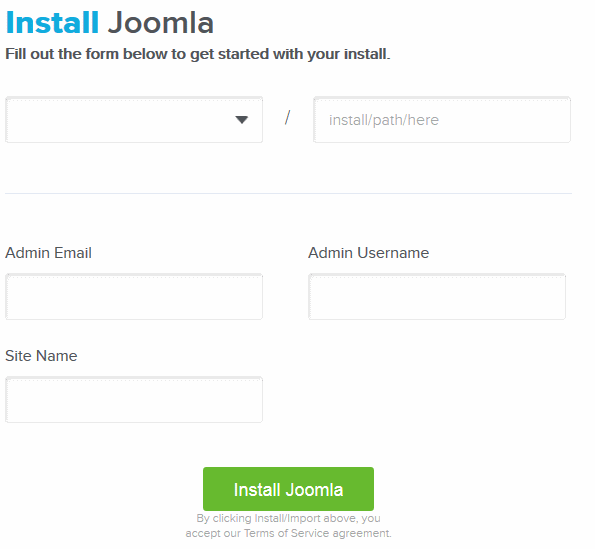
Choose the domain you want to use for the Joomla installation. If you can’t find your domain, you’ll have to contact your web hosting company for help.
Scroll down and enter the name and description of your Joomla site, then choose an admin username and password. It’s a good idea to pick something other than “admin”, as this can be easily guessed by hackers. Make sure you keep a copy of your username and password.
You can change the email and language settings if you’d like. Once you’re finished, click the “Install” button.
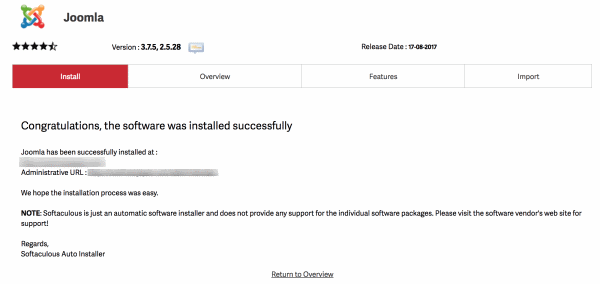
If everything goes as planned, the software should report a successful installation. It will also show your Joomla site’s address and the administrative URL for making changes to your site.
That’s it! Simple, wasn’t it?
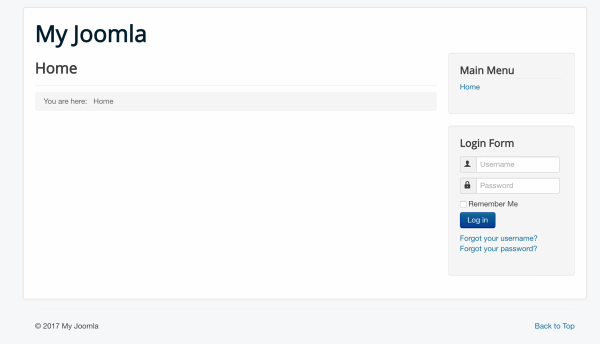
If you click the site link, it should take you to your brand new Joomla site.
Manual Installation
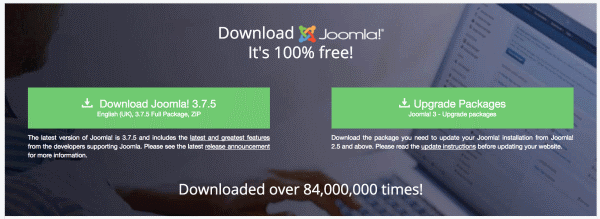
To manually install the Joomla software, you’ll need to head to the joomla.org website (not joomla.com) and click the “Download Joomla” link to download the installation package. Although there are many third-party sites that allow you to download Joomla software, you can never be sure that these copies are safe. It’s always a good idea to download the latest version from the official site.
Click the “Download Joomla!” link to download a .zip file containing the latest version of the software.
Next, you’ll need to create a database. Databases are like a set of tables that store all your site’s information.
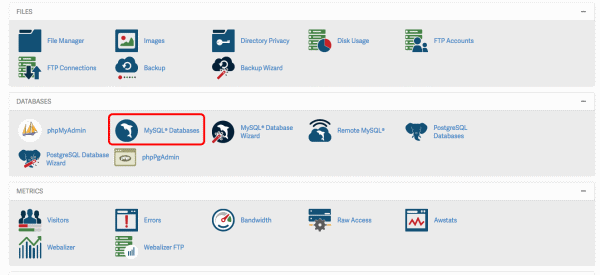
Log into your control panel (using the steps listed above in the One-Click Installation guide) and look for a section called “Databases”.
For this Joomla installation, we’re going to create a MySQL database, so click on the “MySQL Databases” icon.
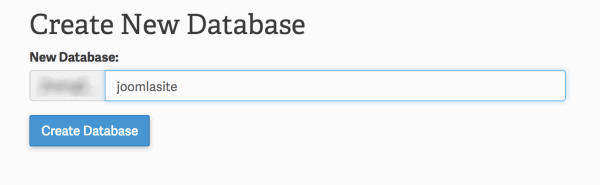
Scroll down to the Create New Database section, enter the name of your database (it can be anything, but it’s probably a good idea to call it “joomlasite” or something similar), and click “Create Database”.
You should see a green checkmark and confirmation that your database has been created.
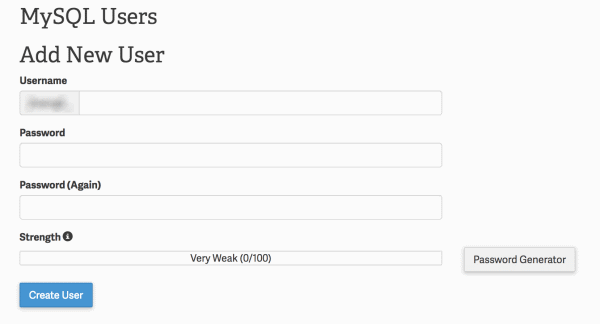
Next, we need to create a user, so click “Go Back”, scroll down to Add New Users, add a username and password, and click “Create User”.
You should see a green checkmark and confirmation that your user has been created.
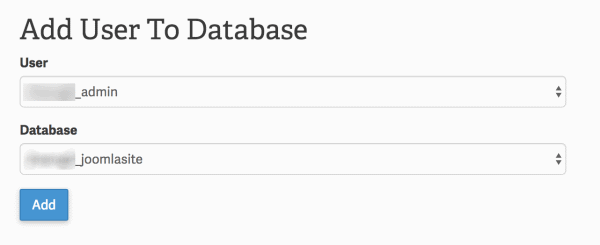
The last thing we need to do is add the user to the database, so click “Go Back”, scroll down to Add User To Database, select the user and database, and click “Add”.
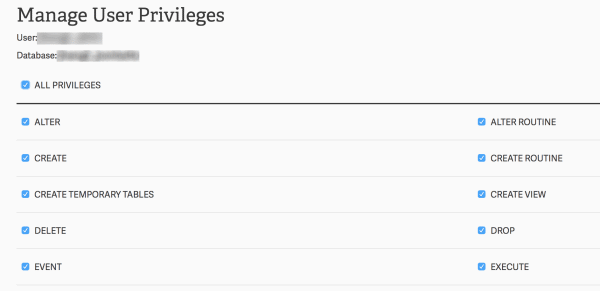
This user will be responsible for the database, so you can give them “All Privileges” and save the changes.
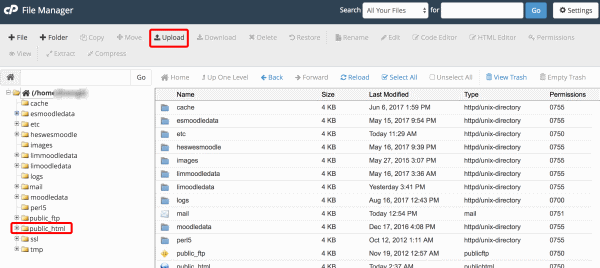
Next, we need to upload the Joomla .zip file into the root folder of your site. This is typically named “public_html” but depends on what your host has set up on the server. If you’re unsure about which folder to upload the file into, it’s a good idea to ask your hosting service.
To transfer the files, you’ll need to use an FTP client or you can use the file manager included in your control panel.
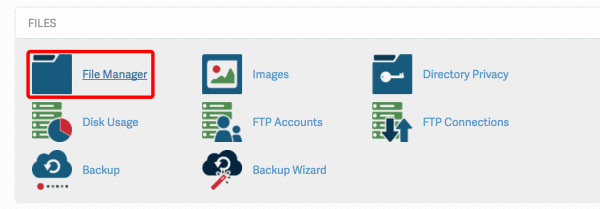
For this example, we’ll take the easier option and use the File Manager. Go to your main control panel page and click on the File Manager icon.
Locate your root folder in the file tree on the left, click “Upload”, select the Joomla installation .zip, and upload the file.
Go back to the file manager, right click on the .zip file you just uploaded, and click “Extract”.
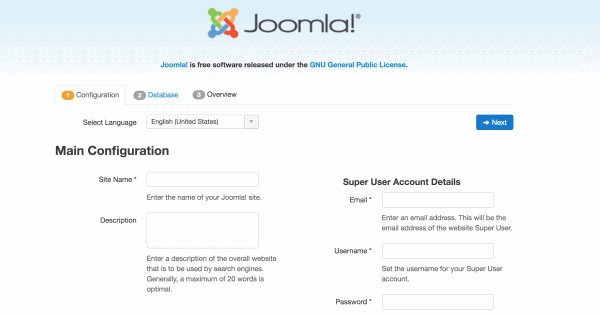
Once all the files have been extracted, open a browser window and enter the address of your site. You should see a Joomla installation page. Enter your site name and user details and click “Next”.
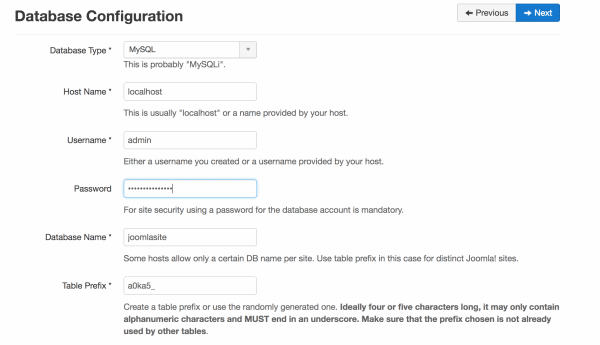
On the Database page, enter all the details from the database you created earlier and click “Next”.
You can check the installation details for your site then click “Install”.
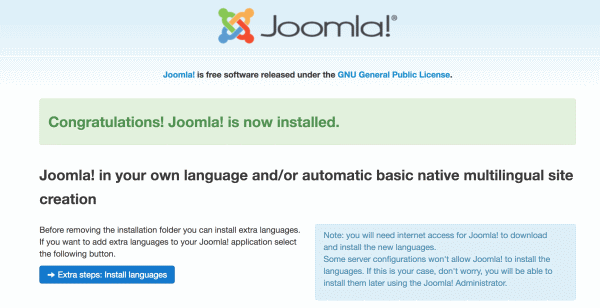
You should get a green confirmation message saying the installation was successful.
Create Your First Joomla Post
Your site probably looks pretty boring at the moment, so let’s start by adding a new post. Posts in Joomla are usually called Articles, and they will make up the majority of your Joomla site. Articles can be categorized by properties such as time and date, meaning it’s easy to keep all your posts organized.
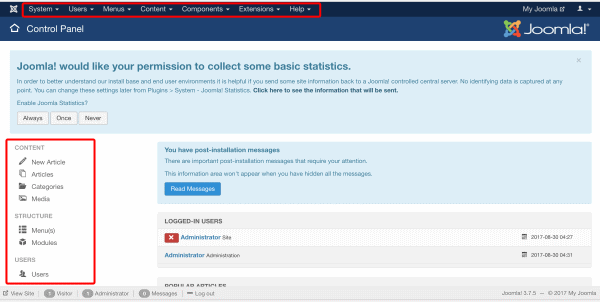
Most of the development of your site will be done using the Administrator’s Control Panel.
You can go to the Joomla Administrator’s Control Panel by adding /administrator to your site’s address. For example, if your site is cooljoomlastuff.com, your Control Panel can be found at cooljoomlastuff.com/administrator . To access the Control Panel, you’ll need to enter your admin username and password.
The Control Panel lets you do a variety of things such as create new posts, add users, read messages, change your site design, and add themes and extensions.
You can access all the features from the top menu, or you can access some of the most useful features from the menu in the left sidebar.
To create a new post, click on “New Article” under the Content menu in the sidebar.
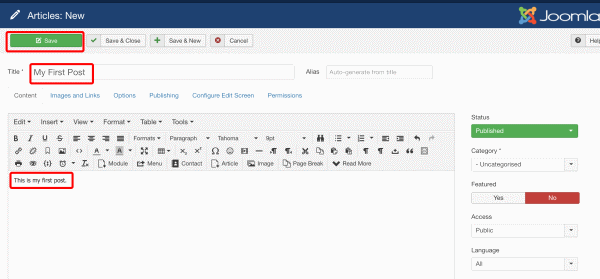
You should see a text editor that looks just like an old version of Microsoft Office. It functions just like any other word processing software – you can change fonts and font sizes, make text bold, adjust alignment, add media and tables, and even print the document.
To begin with, enter a name for your post and add some text to the post field. When you’ve finished, click the green “Save” button.
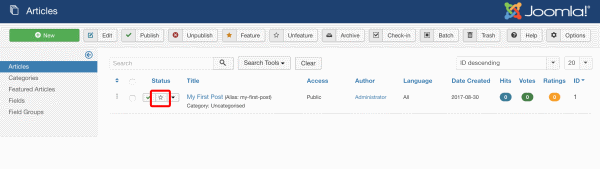
If you click the “Close” button, you’ll be taken back to the Articles page. From here you can see all your articles and their current status (whether or not they have been published).
At the moment, the homepage of our site is only configured to show Featured Articles, so let’s make this article Featured by clicking on the yellow star next to the article title.
If you click on the “My Joomla” link in the top right hand corner of the page, a new window will open with a preview of your site. You should be able to see your first article, ready for the world to read.
Create A Category For Your Post
The next thing you’ll need to do is assign your article to a specific category. Categories are how you keep all your posts organized. You can create categories based on the type of article, the topic or theme of the article, or any other factor you’d like. Categories are hierarchical, which means you can have categories within categories. You can also define category wide settings so they will automatically apply to any article in that category.
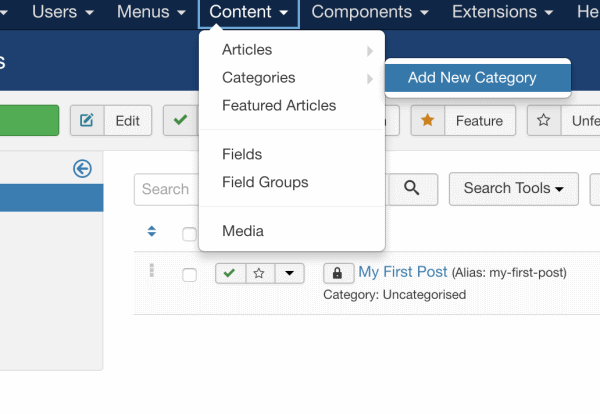
To create a new category, go to the top menu bar, highlight Content, Categories and click “Add New Category”.
Add a title and description for the new category. In the sidebar, you can specify a parent category (a category to which this category will belong).
Click “Save”.
To add your first article to this category, navigate to the articles menu and click on your article. In the right sidebar, you can select the category from the drop down Category menu. Don’t forget to click “Save” before exiting.
Create A New Page
The difference between posts and pages can be a little difficult to understand at first.
In general, posts are dated content entries that you can add to your site. Posts are designed to be time related – as you add new posts, older posts are shuffled down the order. Posts are good for regularly adding new information to your site, and are often used to encourage conversation.
Pages form the structure of your site. Take a look at any website and you’ll see it’s made up of one or more pages. For example, a business website might have a “Home” page, an “About” page, an “FAQ” page and a “Products” page. Pages are usually static, meaning once you have a good structure in place, you probably won’t need to add pages often.
The most important thing to remember about pages is that once you’ve made one, you need to link it to your site for it to be visible. This is usually done by putting a link in the menu bar.
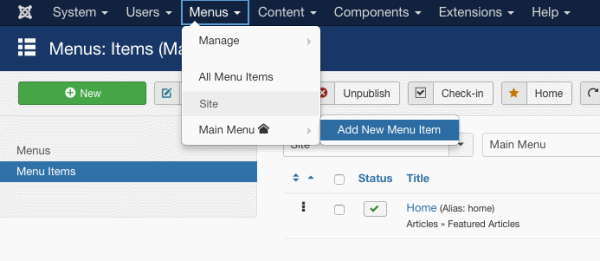
To create a new Joomla page, go to the top menu and highlight “Menus”, “Main Menu” and click on “Add New Menu Item”. This will create a new page in your Main Menu.
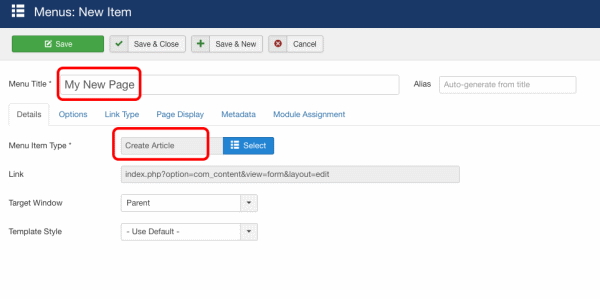
Add a title for your new page in the Menu Title box (we’ll call this one “My New Page”), select a Menu Item Type (for this example we’ll use a Create Article type, which makes a page to help create articles), and click Save. You can learn more about the different kind of menu item types by reading the Joomla Documentation.
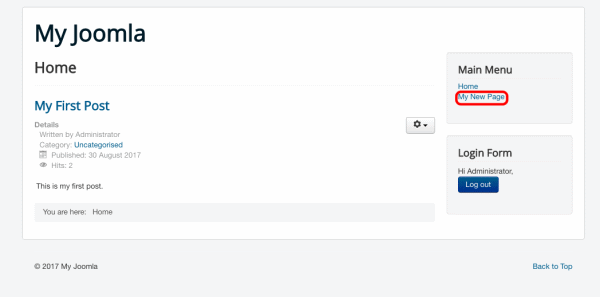
You should now be able to see your new page by viewing your site with My Joomla and clicking on “My New Page” in the menu sidebar.
Install A Theme
The standard Joomla site looks very basic, so it’s a good idea to install a theme. In Joomla, themes are usually called Templates.
Templates make it easy to change the style and design of your site. You can choose from a variety of free and paid templates that offer unique options for your page layout, colors, typography, modules and plugins.
It’s a good idea to look for a template that is responsive (it automatically changes the layout of your site depending on what kind of device is being used for browsing), is regularly updated, and has good support.
You don’t need to limit yourself to just one template. You can download as many templates as you like and switch between them until you find one that suits your style.
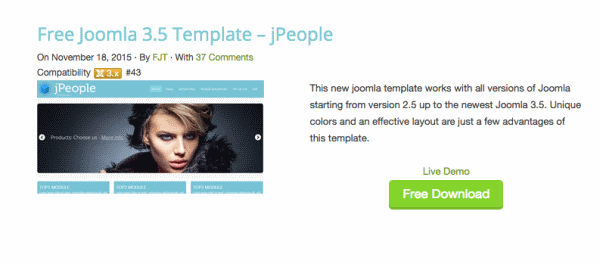
To find a template, you can Google “Joomla templates”, find one you like, and download the template .zip file. Make sure it’s compatible with your version of Joomla. For this example, we’ll use a free template called jPeople.
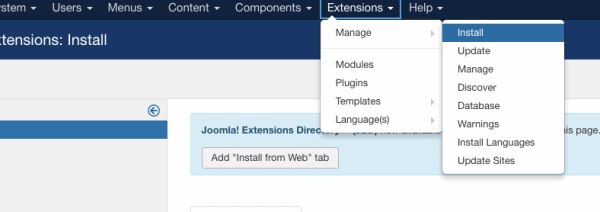
To install the template, go to the menu bar and highlight “Extensions”, “Manage” and click “Install”.
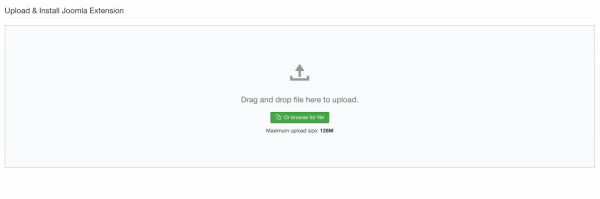
You can drop the .zip file in the drag and drop area and it will automatically install.
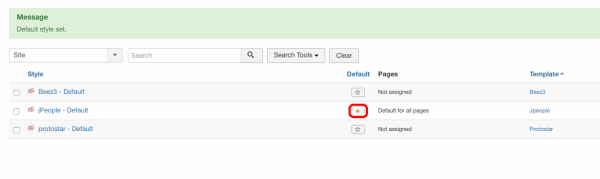
When the template has successfully installed, click on “Go to the Template Manager” and click on the star to make your new template the default template.
If you click on “My Joomla”, you should find that your site looks very different. The colors have changed, the top header is different, and there is a picture slider.
If you want to start customizing your template, click the template name on the “Template: Styles” page. You should see lots of options such as adding a logo, adding social media links and changing the slide images.
Add Some Extensions
Extensions allow you to easily increase the functionality of your site. If you visit extensions.joomla.org, you’ll see there are all kinds of extensions for just about any task you can imagine.
Some popular extensions:
Akeeba Backup, which lets you create a site backup, and makes it easy to restore sites, migrate sites, or even deploy sites to a client’s computer.
Google Maps Plugin, which lets you quickly embed maps on your site.
JEvents, which adds calendar and events management functionality to your site.
FaLang, which makes it easy for you to offer multiple language versions of your site.
Adding extensions to your Joomla site is simple. The process is the same as adding a new template. All you have to do is download the .zip file and upload to your site it on the “Extensions – Manage” page.
For this example, we’ll install the Akeeba Backup extension. Visit the Akeeba Backup page, click on the “Get Akeeba Backup” link and download the core version for Joomla.
Go back to your Joomla admin panel, go to the menu bar and highlight “Extensions”, “Manage” and click “Install”. Drop the .zip file into the drag and drop area, just like you did with the template.
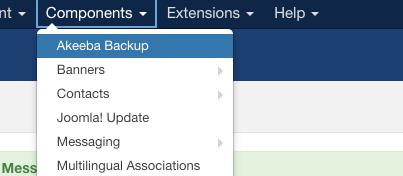
When the extension has been installed, you can manage it by going to the top menu, highlighting “Components” and clicking “Akeeba Backup”.
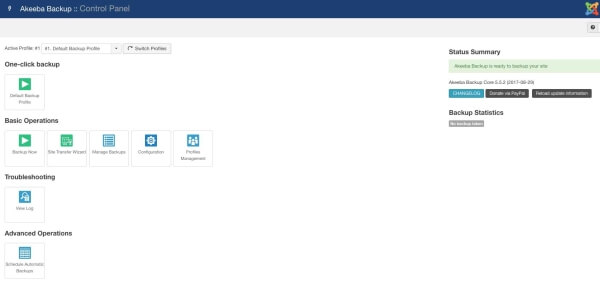
From here, you can use the extension to backup your site, manage backups, or even schedule automatic backups.
Final Thoughts
If you’ve followed this guide from start to finish you should have a basic Joomla site ready to use. You should be able to add posts, add pages, manage menus, change your template and add extensions.
It’s important to remember that all this is just the tip of the iceberg. Joomla is both customizable and incredibly powerful. To really get the best out of your Joomla site, your going to have to start exploring all the other functionality Joomla has to offer.
A great place to start is the Joomla Documentation, which has a number of easy to follow tutorials.
Once you’ve created your blog and spent time building your audience, you will want to make sure to protect all your hard work.
One of the nice things about being a blogger is that you can take some days off here and there and still have your blog up and running. But this doesn’t mean you shouldn’t keep an eye on your blog while you take some time off.
But the most important thing to keep an eye on is whether your blog is up and running! This is known as “uptime” and it’s something that every serious blogger needs to keep an eye on.
Why would your blog have “downtime”? Most of the time this is an issue with your hosting company. If you choose a good hosting company like I recommend in my guide, this should keep any issues to a bare minimum. But even good hosting companies have a few minutes of downtime every year for maintenance.
So how do you keep an eye on your blog’s uptime?
The most straightforward way to make sure your blog is up and running is to simply visit your blog and make sure it loads correctly. But almost no one will remember to do this right every day, and ideally you want to make know as soon as your blog is down so that you can contact your hosting company to get the issue resolved as quickly as possible.
This can be easily accomplished with an uptime monitoring service which notifies you as soon as your blog is down. There are several services like this, but my favorite is Host-Tracker.com. You get a text or email as soon as your blog experiences any downtime, and they also monitor your domain name registration to make sure you don’t accidentally let it lapse.
While I don’t recommend uptime monitoring to new bloggers, if you have an established blog that you depend on for income then I think it is no brainer to get a service like Host-Tracker to make sure everything is running smoothly.
It seems that not a day goes by without at least one of my readers emailing me to ask how they can grow and maintain a community of readers for their blog.
After all, most people do not get into blogging just to write for themselves or their friends and family. If you are putting in the time to create great content, then you want people to discover it and interact with you about it.
It should also come as no surprise that the most successful blogs out there typically have a thriving community of readers. Building a community around your blog can seem intimidating, but my advice will show you that it does not have to be that way.
If you are interested in learning how to go about building a community around your blog then read on to discover my top four tips for how to build and maintain your blog community!
1. Identify Your Blog’s Audience
The first step in building up your blog’s audience is to identify the type of person who is most likely to be your average reader. Here are some questions to get you thinking about exactly who your audience is:
Where does your average reader live?
How old are they?
Are they more likely to be a man or a woman?
What is their average income level?
Are there other things that they most likely care about, beyond the topic of your blog?
How often do they use the Internet?
Which parts of your blog’s topic are your readers likely to find most controversial?
Which parts of your blog’s topic are your readers most likely to agree on?
What are your reader’s biggest concerns, either about your topic specifically or more generally?
What are they most passionate about?
What can you do to help them or inspire them?
Is your blog something your readers will be interested in reading every day, or only occasionally?
Of course, the answers to these will vary widely depending on exactly what your blog is about.
In some cases, these questions might not even apply to your readers. For instance I would like to think my free guide on how to start your blog is widely applicable across many different demographics!
Keep in mind that the type of person who you consider your target audience might evolve over time, and it might even surprise you.
Because the potential reach of your blog is global, some of your readers might be coming from places that you would not have ever expected. This is just another fun aspect of blogging.
Once you narrow down who is most likely to be interested in reading your blog, the question becomes how you can reach them and try to get them interested in joining your blog’s community.
2. Get People Talking
Once you have an idea of who your average reader is, it is time to capture their interest and get them talking.
The simplest way to get your readers engaged with your content is through providing value to them. That value can be as simple as a new perspective on a topic they care about, or perhaps some piece of information that they might not be aware of.
Of course, in order to get people talking you will first need to drive them to read your blog. One great way to grow your blog’s audience is to simply reach out to other bloggers who cover topics similar to yours.
Most bloggers publicly list some form of contact information, typically either a “Contact Me” form or an email address, so I recommend taking advantage of this to see if you can arrange for a link exchange or a guest posting opportunity.
Link exchanges generally refer to another blogger linking to some content of yours in exchange for you doing the same. Guest posting refers to an agreement where you write a post for their page, and perhaps they do the same.
3. Moderate Your Comments Section
Traditionally, the place where blog communities are formed is through the comments section.
Having a comments section below your blog posts opens the door for readers who have a reaction to your posts to immediately post their opinions. From there, you and other readers can use their reactions as a jumping off point to start a conversation.
The comments section also provides a good measure of which posts your readers are most interested in. It is one thing to initially hook a reader with a headline or image, but if you are able to get them to read your entire post and inspire them to immediately react then you know you are doing something right.
As you progress in your blogging career, you will likely notice certain patterns around what sort of content is most likely to trigger a response from your readers. For instance, my experience has typically been that short blog posts with a clear opinion will result in the most activity in the comments section.
4. Make Yourself Available
In addition to staying active in the comments section of your blog, I always recommend that beginning bloggers make themselves available to their readers via email as well.
Allowing your readers to contact you personally lends a certain credibility to your blog, and opens the door for your readers to sound off, compliment you or even suggest other potential pieces of content for your blog.
You never know what kind of relationship you can forge simply by making yourself available. Most other bloggers are just like you: passionate people who are interested in having as many people as possible read their content. Making yourself available allows for other bloggers to contact you and potentially create a relationship that is mutually beneficial.
These four simple tips should show you why it is so important to focus on growing and maintaining a community around your blog. Thankfully this process can be straightforward and easy, and many bloggers say that interacting with their readers is one of the most rewarding parts of blogging.
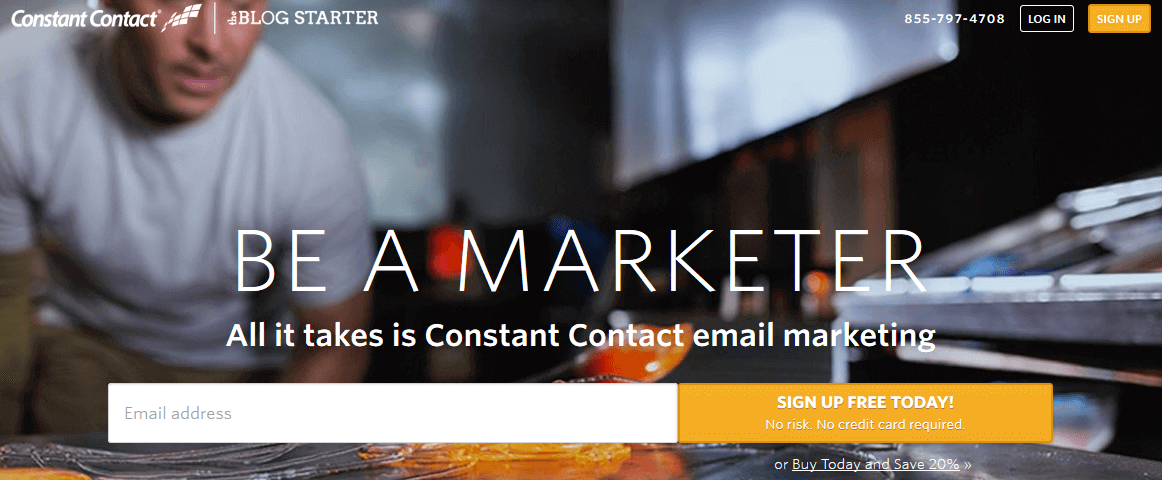
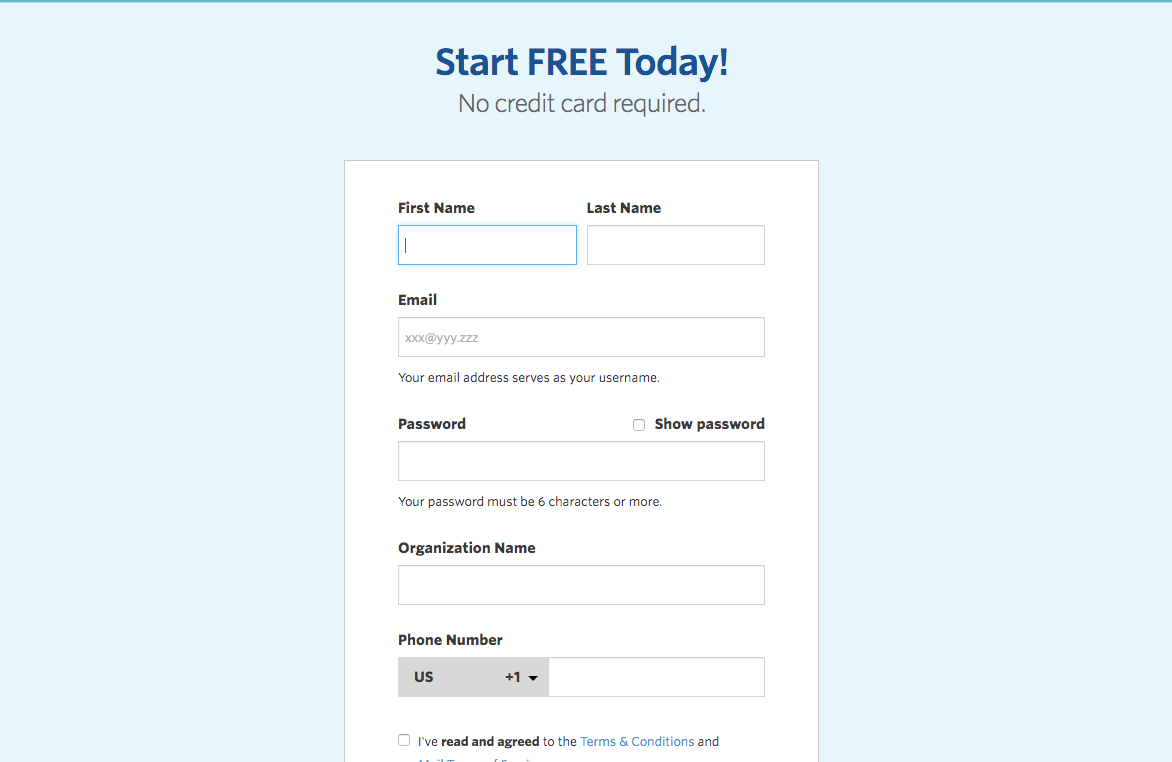
This will take you to the sign up page, where you will need to enter your name, email and other info in order to get signed up.
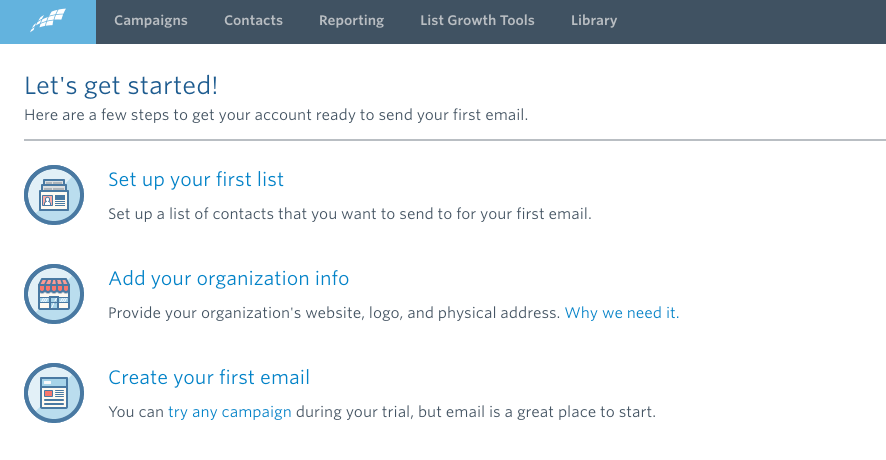
Now that you have signed up, you will be taken to the Constant Contact dashboard page. On this page, Constant Contact lays out a very easy three step process for getting started.
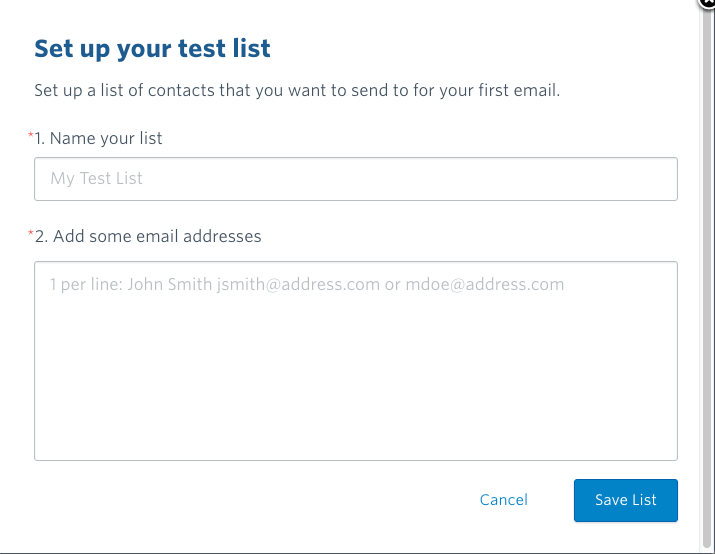
2. Set Up Your First List
First, click through the “Set up your first list” prompt. You will then be asked to set up your test list.
Give this list a simple name, such as “Blog Readers.” If you already have an email list, you can paste it into the second field.
If you do not yet have an email list, simply enter in your own email address and perhaps a few friends’ email addresses to serve as your test group.
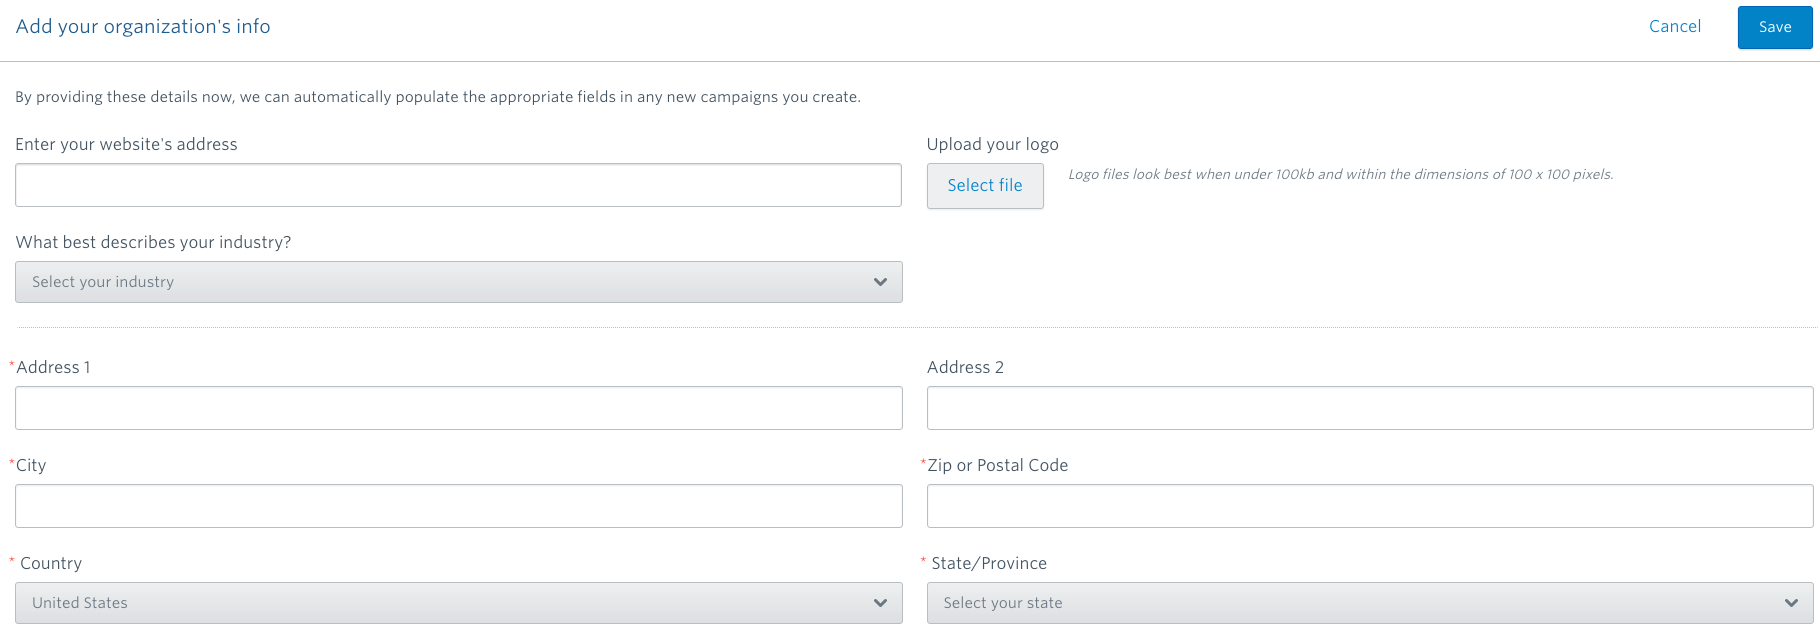
3. Add Your Organization Info
Now that you have set up your first list, you will need to go to step two: “Add your organization info.”
This step requires you to enter organization info to ensure that you are staying on the right side of the CAN-SPAM act passed by congress.
You are legally required to enter this information if you will be sending outbound marketing emails, but Constant Contact makes it easy for you to stay on the right side of the law.
Once you enter your information and click save you can then move forward to the third and final step.
4. Create Your First Email
Now that you have finished the first two steps of the process, it is time to click “Create your first email.”
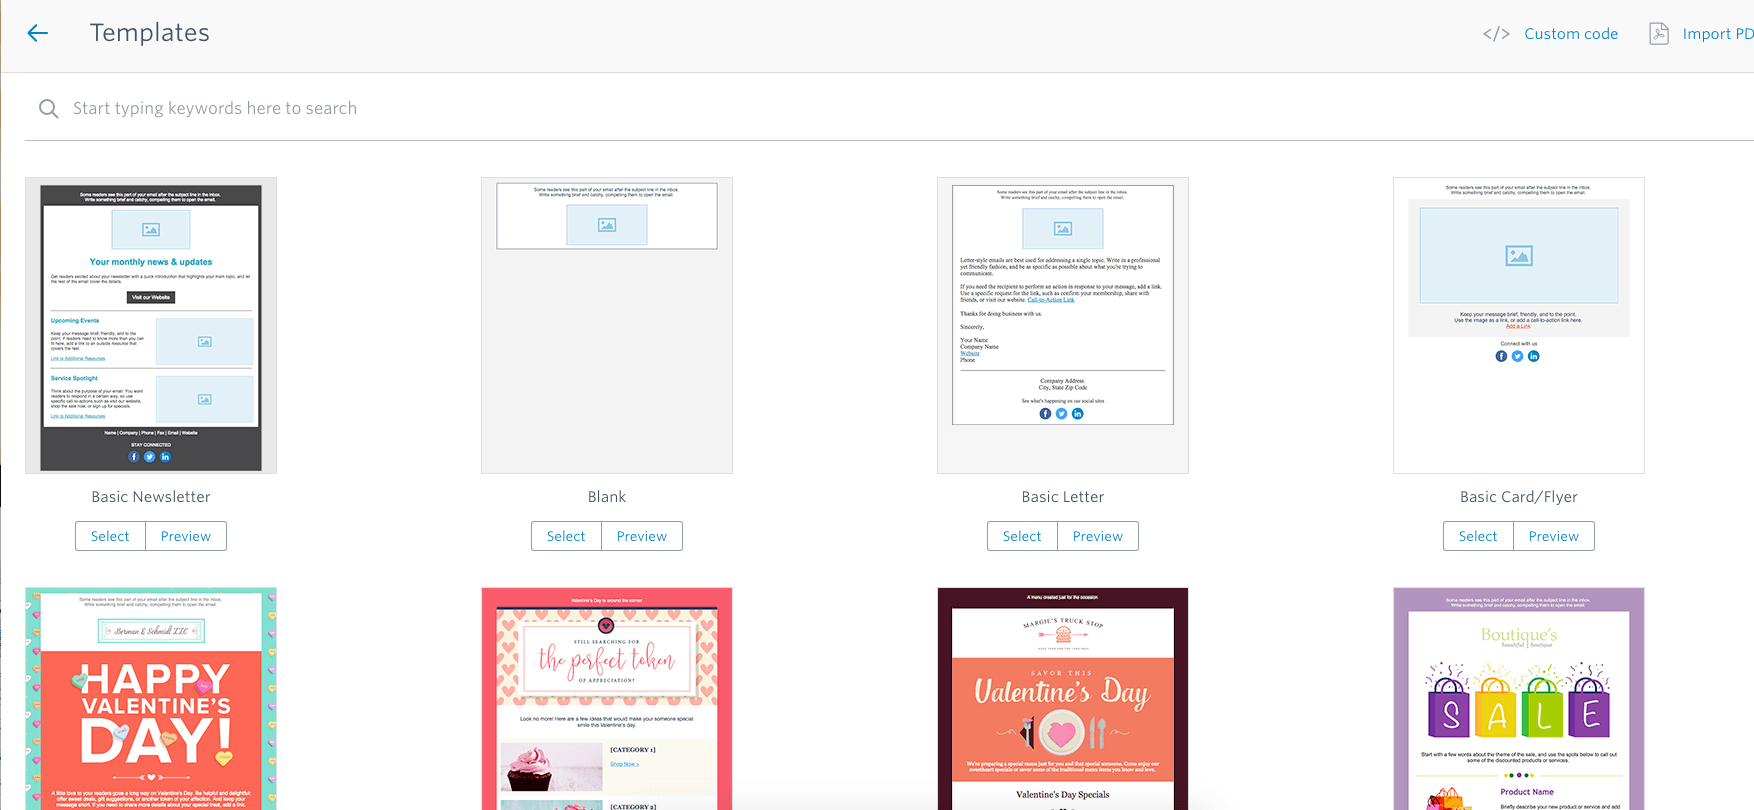
This step will take you to a page that shows off where Constant Contact really shines: customization.
You can choose from a large gallery of well-designed templates when creating each email that you send. This is a simple way to make sure that your emails are visually interesting and that they look professionally designed.
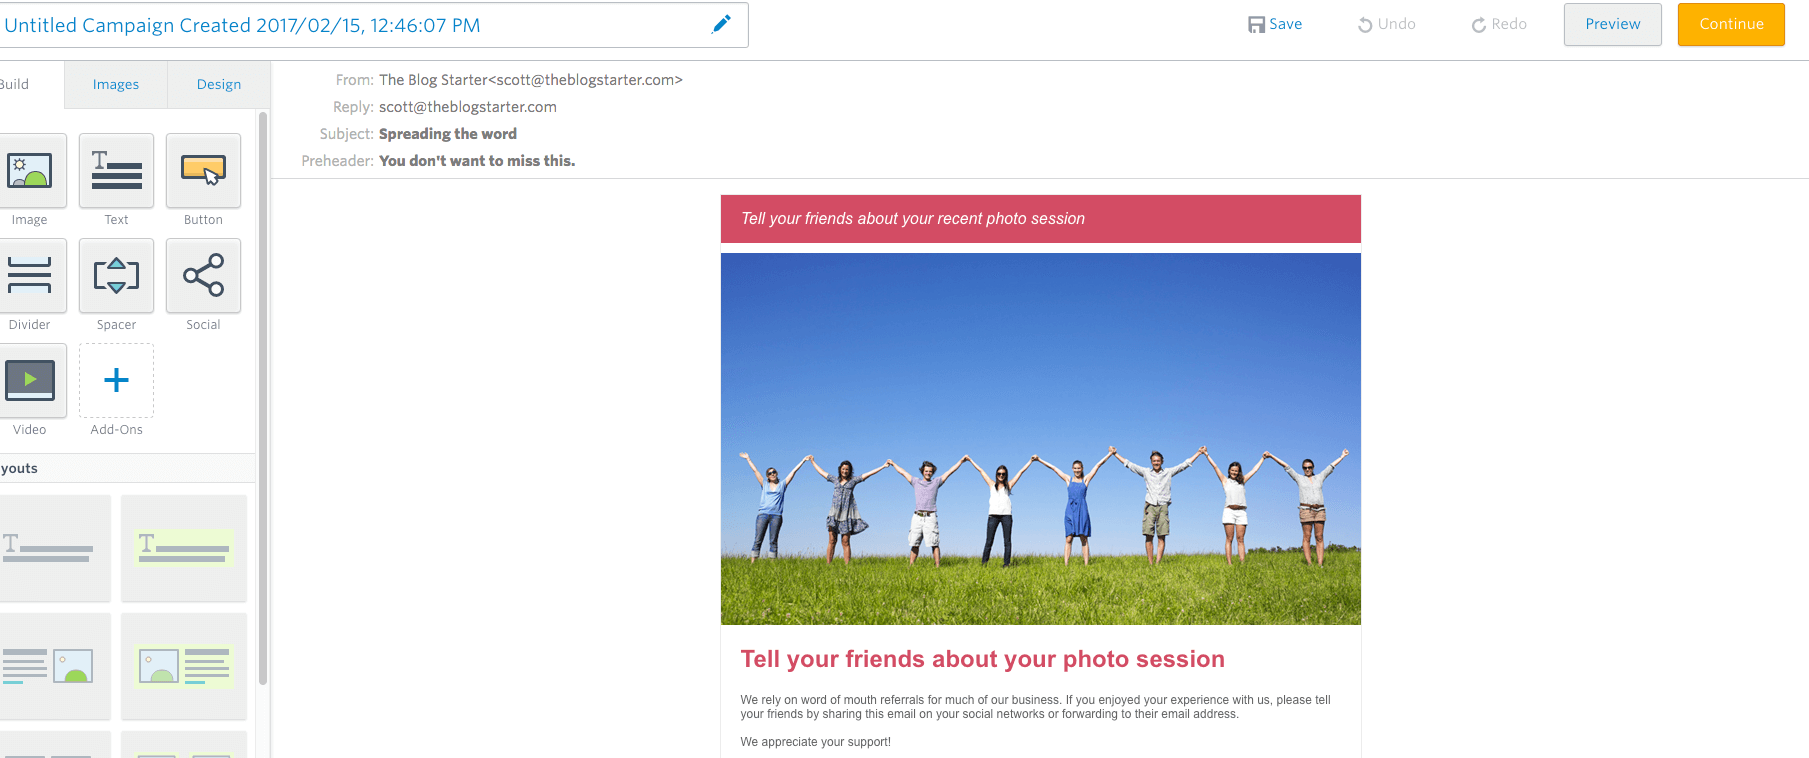
Once you click “Select” you will be taken to the drag and drop email generator.
This screen will allow you to give a custom title to your email, as well as make tweaks and use all kinds of add-ons.
I recommend playing around in this design tool to experiment with the different options that Constant Contact makes available to you. You can even add your own images, text and branding to give your emails a personalized touch.
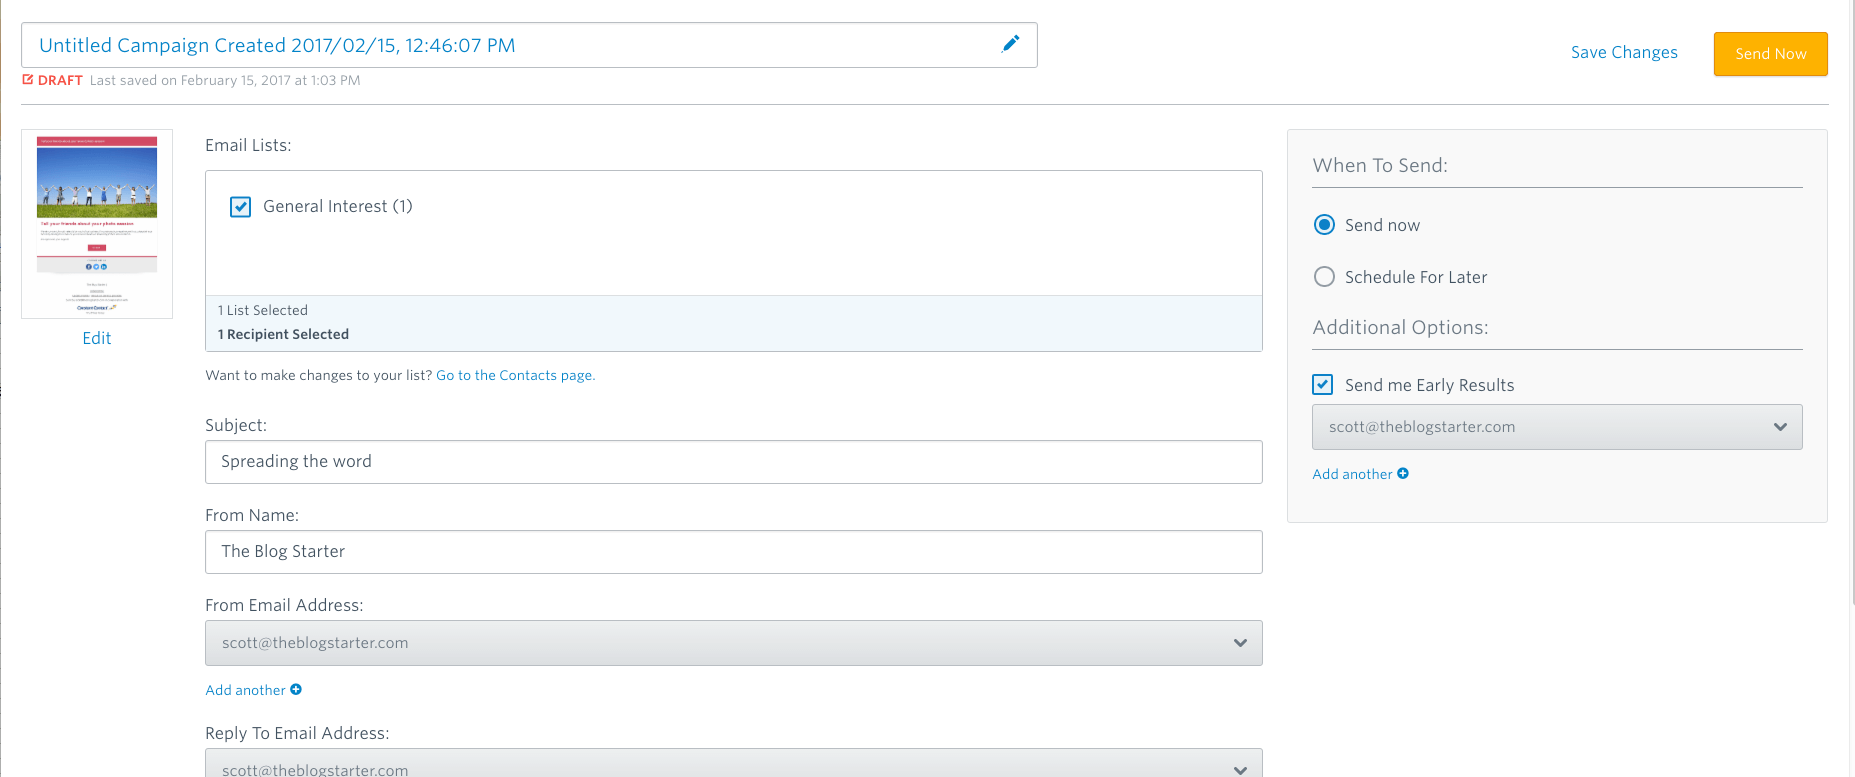
Once you have designed the email to your specifications, you can click continue to be taken to the final options page.
This page allows you to make all sorts of final specifications to your email before you send it out. Chief among these is allowing you to choose exactly which email list you want to send your email to.
You are also able to edit the “from” and “reply to” email addresses that your recipients will see, as well as schedule out when the email will actually be sent. This is one of my favorite features since it allows you to plan ahead and schedule emails to be sent at the most strategic time possible.
How To Collect Email Addresses From Your Blog
Now that you have a good understanding of what Constant Contact is and how to use it, the next step is making sure that you are putting yourself in a position to collect as many email addresses as possible.
The best way to get email addresses from your subscribers is to prompt them to provide you with their email address. And the easiest way to do that is by using a default Constant Contact signup form in WordPress.
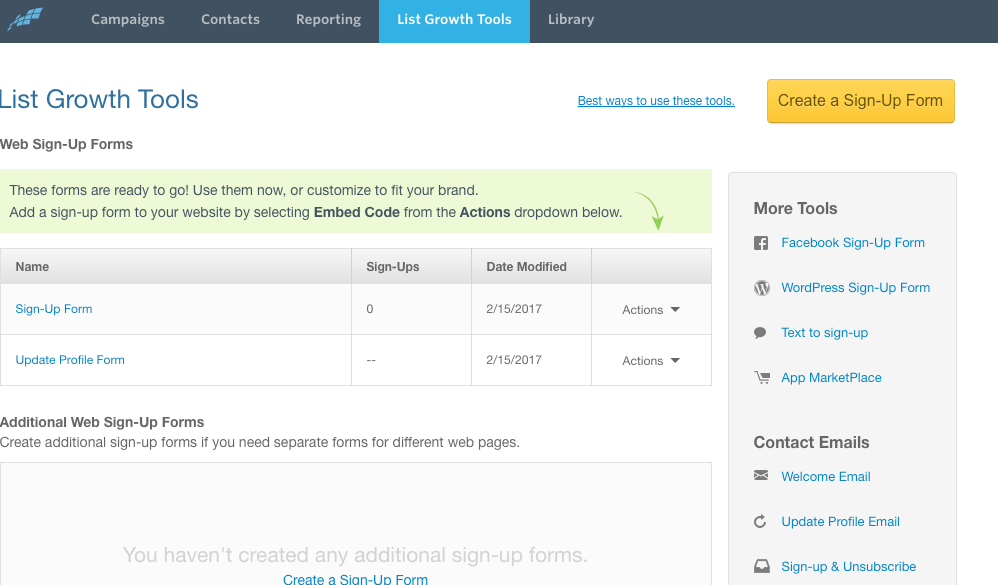
In order to do this, you will need to click over to “List Growth Tools” on the header bar at the top of the page in your Constant Contact dashboard.
From there, you can click “Create a Sign-Up Form” to be taken to the sign-up form creator.
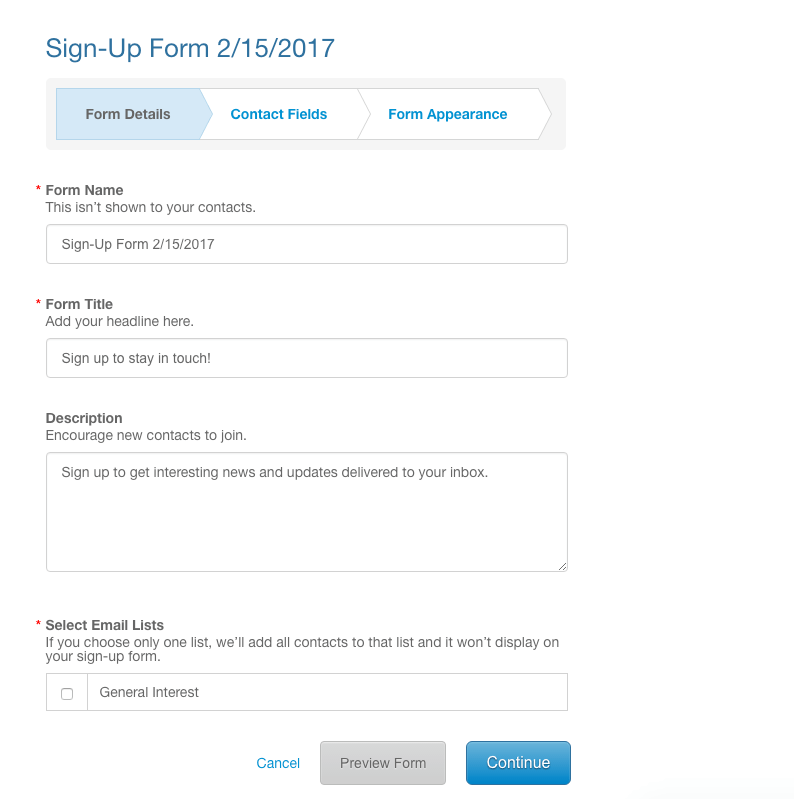
First, you will need to give your sign-up form a name using the “Form Name” field. This name will only be seen by you, so make sure you give it a name that will help distinguish it.
The “Form Title” and “Description” fields are what your readers will actually see, so make sure you are inviting them to sign up for your email list.
I also recommend letting them know that your email list is the best way to stay in touch with your blog, and also potentially offering exclusive content to entice them to sign up.
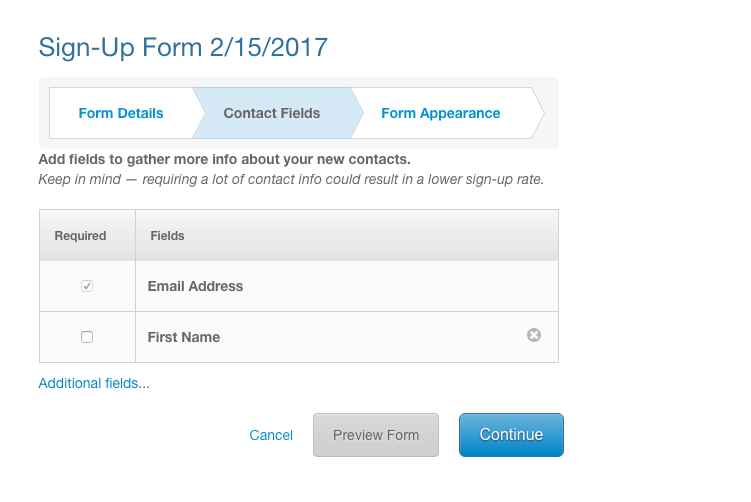
Now that you have created the basics of your sign-up form, click “Continue” and move forward to the “Contact Fields” tab.
This page will allow you to select the information that you will actually collect from your readers when they are signing up for your email list.
I recommend keeping this section as simple and straightforward as possible. The last thing you want to do is dissuade someone from signing up for your email list because it is too complicated or time consuming.
Once you are finished selecting the information you will collect, click “Continue” again.
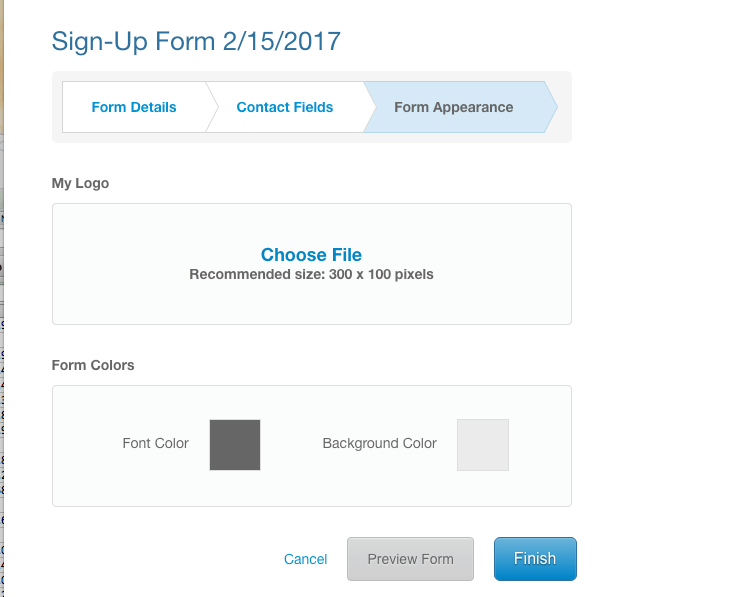
This will take you to the “Form Appearance” tab where you are able to edit the font and background color for the sign-up form.
Once you have designed the form to your specifications, you will need to click “Finish” to move forward with actually setting the form up on you blog.
Adding Your Constant Contact Sign-Up Form to your WordPress Blog
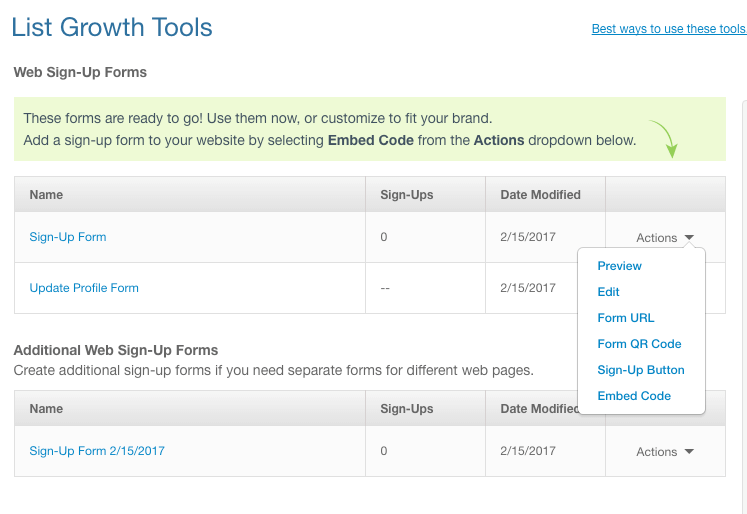
In order to add your Constant Contact sign-up form to your WordPress blog, you will need to click on the “Actions” drop down next to the sign-up form that you created on the “List Growth Tools” page.
From that drop down, select “Embed Code.”
Next, a pop-up will provide you with the embeddable HTML code that you can use to add a sign-up form to your blog.
You will need to copy this code and then login to the Admin area of your WordPress blog.
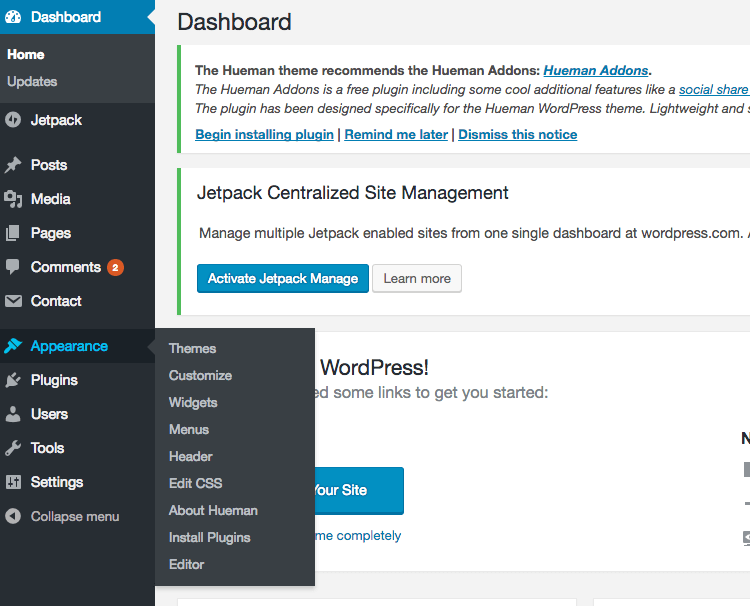
From the WordPress Admin panel dashboard, select “Appearance” and then “Widgets.”
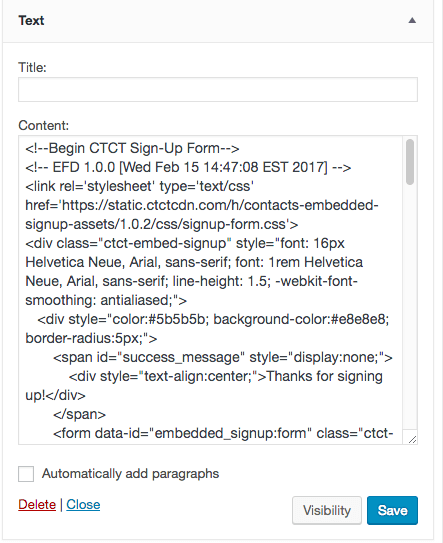
You will need to select the “Text” widget and then paste the copy provided to you by Constant Contact into the text box.
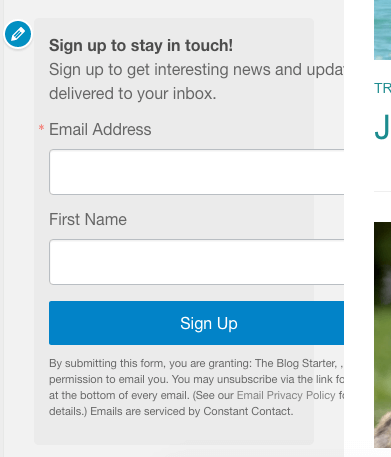
Once you click “Save” you will be able to view the email list sign up form where you placed it on the page.
Now that we’ve setup Constant Contact and added the sign-up form to your blog, let’s talk about how you can use Constant Contact to promote your WordPress content.
5. Adding WordPress Posts Into Constant Contact Emails
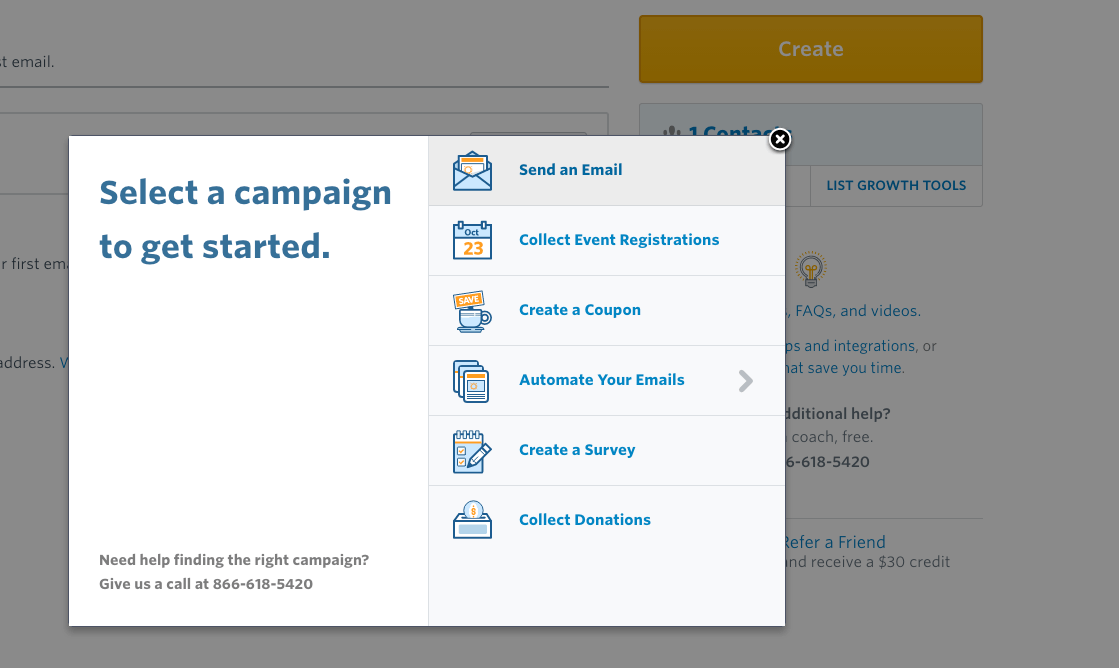
In order to add a WordPress post into a Constant Contact email, you will need to click over to the Campaigns page.
From there, click “Create” and then “Send an Email.”
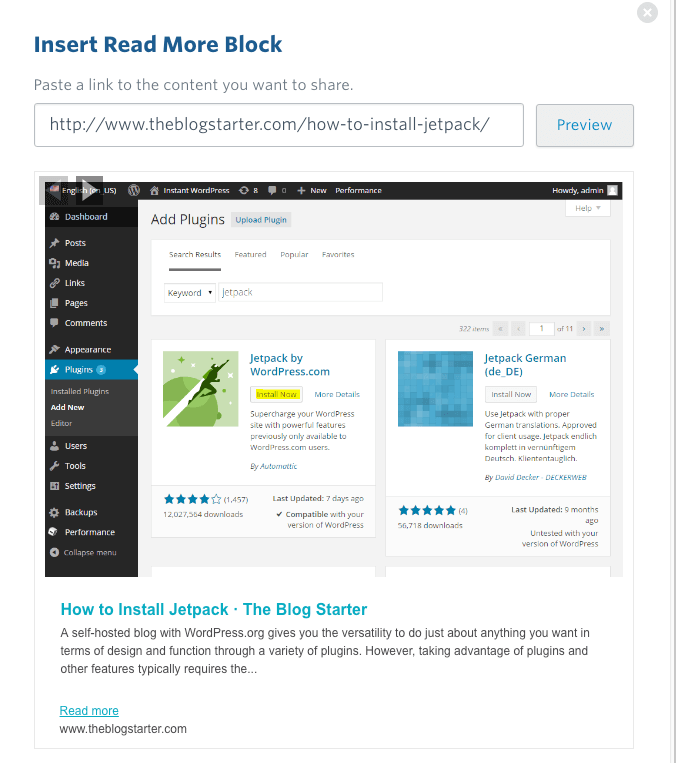
From here, simply choose a template for your email. Once you are at the email design screen, click “Add-Ons” and then “Read More.”
This screen will allow you to enter in the URL for the WordPress post that you want to promote in your email.
Even better, Constant Contact automatically pulls in an image preview for your article as well as a quick content summary.
This gives your email recipients a nice teaser of the content to come, which increases the likelihood that they will click through to check it out for themselves.
Once you have finished with this step, you can move forward and send the email out to promote your content.
Now you should have a clearer sense of the value of email marketing, as well as an understanding of how Constant Contact can help you create and manage an email list for your WordPress blog.
Keep in mind that the greatest way for you to take advantage of this tool is by creating the best content you can. Constant Contact is ultimately just one more excellent way to make sure your blog is viewed by as many people as possible.